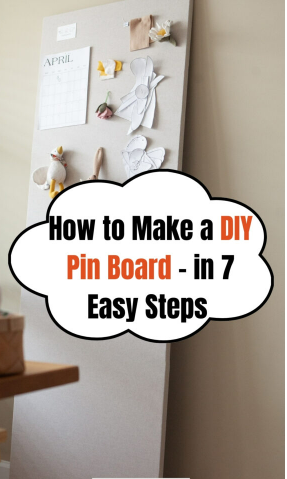
How to Make a DIY Pin Board – Ultimate Guide

Have you ever tried to make your own pin board?
It might look okay when you first finish it.
But then the pins will not stick, the fabric gets loose, or it falls off the wall.
This happens when guides forget the small but important steps.
This guide will show you how to build a pin board correctly.
You will learn about strong glue, the right cork, and how to hang it securely.
Which Adhesives Should You Use?
The type of glue you use is very important for a long-lasting board.
Using the wrong kind can make the cork peel off or damage the foam.
A strong PVA wood glue or contact cement works best for gluing cork to wood.
You should spread the glue evenly across the whole surface.
Then, place a heavy object on top while it dries.
This step keeps the board flat and stops bubbles from forming.
If you are using a foam board, be very careful with spray glue.
Many common sprays will melt the foam.
You must use a foam-safe adhesive or a hot glue gun around the edges.
Materials That Actually Work
You need the right supplies to build a board that works well.
Start with a piece of MDF board that is a quarter-inch thick.
You will also need foam insulation panels that are the same size as the board.
Choose a strong and sturdy fabric for covering the board.
You will need a hot glue gun or a foam-safe spray adhesive.
A stapler with short staples is necessary to attach the fabric.
Finally, you need long screws and flat washers.
These are used to hang the board securely on your wall.
They prevent the board from falling down later.
Step-by-step method to Make a DIY Pin Board
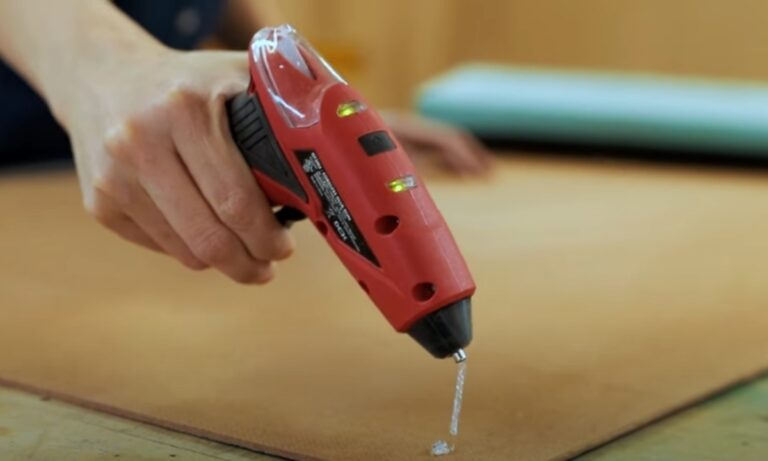
Glue foam to the MDF
Begin by placing your MDF board on a flat work surface.
Put small dots or lines of hot glue onto the MDF.
Then, carefully place the foam panel on top of the glue.
Press down firmly to make sure it sticks well.
The goal is to just hold the foam in place for the next steps.
You could also use a spray adhesive for this part.
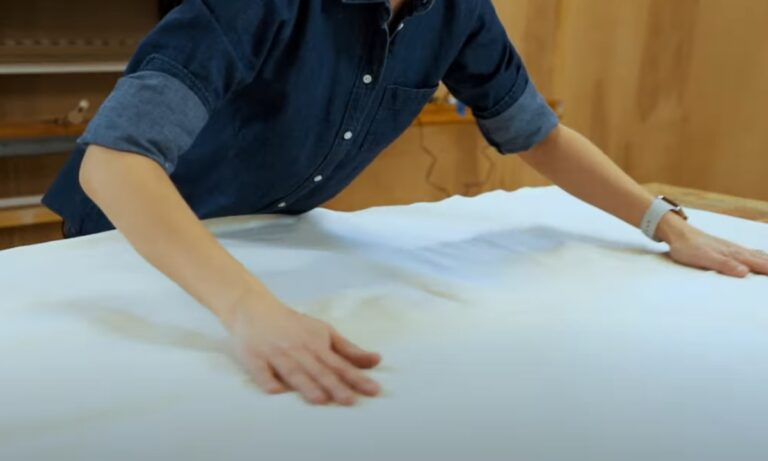
Prep the fabric
Lay your chosen fabric on the table with the pretty side facing down.
Smooth it out so there are no wrinkles or bumps.
Place your board on top of the fabric with the foam side down.
The foam should be touching the fabric directly.
The MDF board will be facing up toward you.
This setup makes the next steps easier.
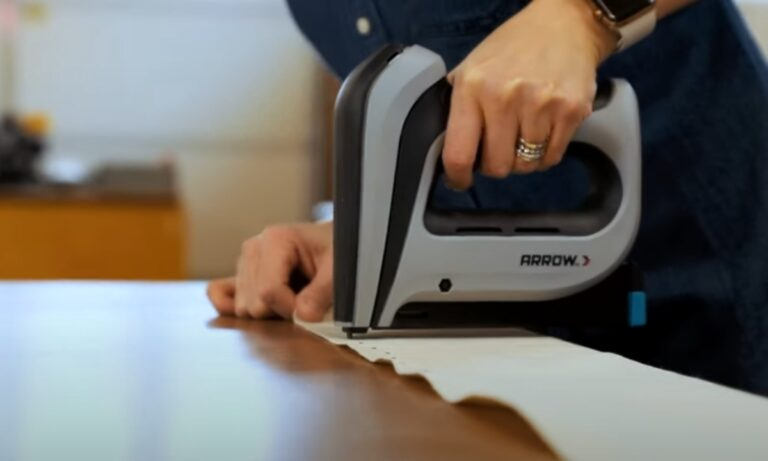
Start stapling the long sides
Pull the fabric over one long edge of the board.
Keep the fabric very tight and put your first staple in the middle.
Continue pulling and stapling outward from the middle toward the corners.
Move to the opposite long side and do the exact same thing.
Pull the fabric tight and staple from the middle to the ends.
Using short staples helps them grip the wood without going through.
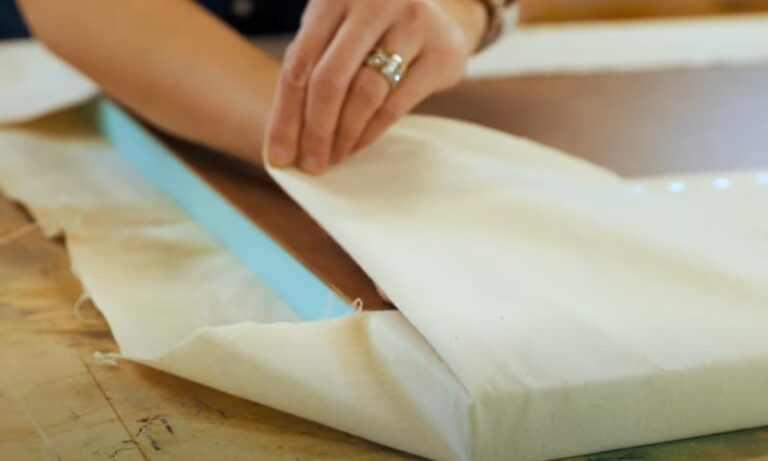
Wrap the short ends like a gift
The short sides need to be folded neatly, like wrapping a present.
Create a clean fold at each corner and tuck in the extra fabric.
Make sure the folded fabric is flat and not too bulky.
Once you have a nice, flat fold, you can staple it down.
This method helps the board sit flat against the wall later.
It also gives the board a professional and finished look.
Finish the perimeter
Go all the way around the board and finish putting in the staples.
Keep the fabric stretched tight and smooth as you work.
When you are done, turn the board over to look at the front.
Check that the fabric is smooth and has no wrinkles.
If you see a loose spot, you can add more staples to pull it tight.
A smooth front is important for a nice appearance.

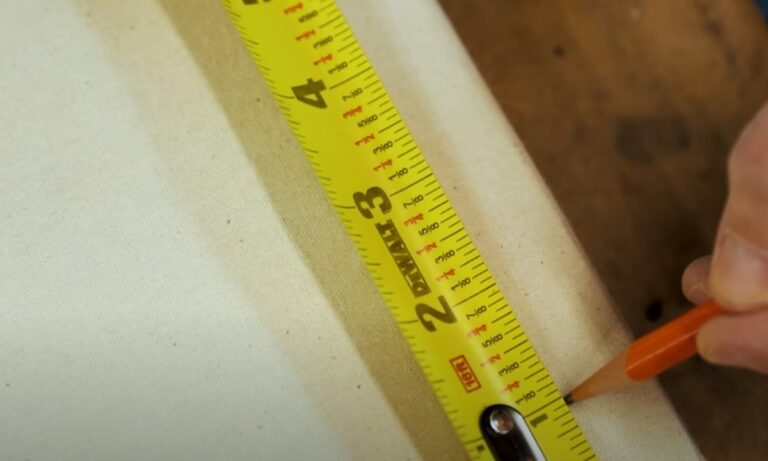
Mark mounting points
Turn the board over so the back is facing you.
Measure about one inch in from each of the four corners.
Make a small mark with a pencil at each of these four spots.
These marks show you where you will put the screws.
They are placed near the corners for the strongest hold.
This keeps the board steady when it is on the wall.
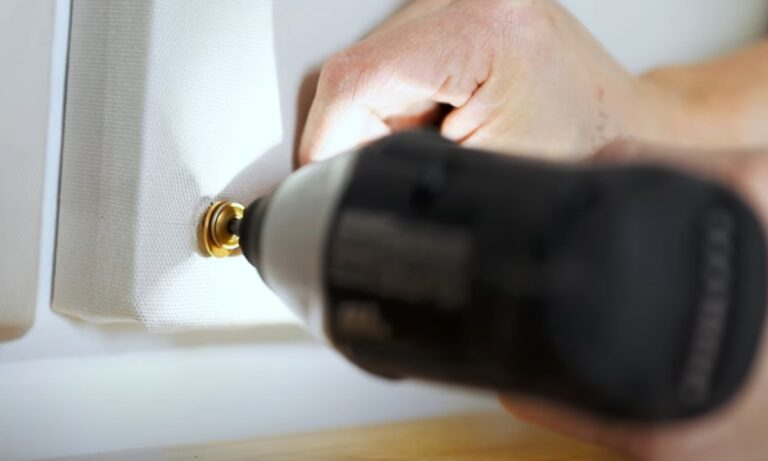
Mount with screws + washers
Hold your finished pin board up against the wall.
At each pencil mark, place a flat washer over the fabric.
Drive a long screw through the washer and into the wall.
The screw should go through the board and into the wall stud.
Stop tightening when the washer is snug against the fabric.
Do not overtighten, or the screw might sink into the foam.
Style and use
Your new pin board is now ready for you to use.
You can pin up photos, notes, reminders, or artwork.
It works great as a family bulletin board or a vision board.
You can change the items on it anytime you want.
It is a useful and attractive addition to any room.
Enjoy your new custom-made organization tool.
How to Hang Your Pin Board Securely?
Hanging the board wrong is a very common mistake.
A board that falls down can be frustrating and can damage your wall.
You must pick a hanging method that can hold the board’s weight.
For a very small and light board, adhesive strips can work.
Just check the weight limit on the package first.
The wall must be clean and smooth for them to stick properly.
A medium-sized board needs a stronger hanging method.
Using D-rings or a picture wire on the back is a good idea.
This spreads the weight and holds the board firmly in place.
For a large or heavy board, a French cleat is the best choice.
It is a simple wooden bracket that holds a lot of weight.
It locks the board onto the wall and keeps it perfectly straight.
Different DIY Pin Board Styles You Can Try
You are not limited to just one style of pin board.
If you need a big board that is easy to move, try a foam-core board.
You can cover it with cork and fabric for a nice finish.
If you rent your home, consider pinnable felt tiles.
They stick to the wall with adhesive but can be removed later.
They usually do not leave any marks or damage behind.
For a board that will last for many years, use cork linoleum.
This material is self-healing, so pin holes close up over time.
It stays smooth and looks great even after heavy use.
You can also make a combination magnetic and pin board.
Put a thin steel sheet under your fabric covering.
This lets you use both magnets and pins on the same board.
Common Mistakes to Avoid
Many do-it-yourself pin boards fail for a few simple reasons.
The biggest mistake is using cork that is too thin.
You need cork that is at least a quarter-inch thick to hold pins.
Using the wrong kind of glue is another major problem.
Some glues can melt foam or simply do not stick well.
Always use an adhesive that is recommended for your materials.
A large board needs a strong backing like MDF or wood.
Without it, the board can warp or bend over time.
Pulling the fabric tight is also key to avoiding a wrinkled look.
Finally, do not try to hang a heavy board with weak hardware.
Adhesive strips are not made for holding a lot of weight.
Use screws, D-rings, or a cleat for a secure hold.
Conclusion
Building your own pin board is a simple and fun project.
Doing it the right way means your board will be useful and last a long time.
Always choose strong materials and the correct adhesive.
Pull the fabric tightly to get a smooth, professional finish.
Most importantly, use a hanging method that can support the board’s weight.
If you follow these steps, you will have a great pin board for years.
FAQs
Why don’t my pins stay on the board?
Your cork is probably too thin to grip the pins properly.
You need to use a thicker piece of cork, at least a quarter-inch.
Adding a firm backing board can also help pins stay in place.
Can I make a pin board without cork?
Yes, you can use other materials like thick felt or foam board.
However, these materials will not last as long as cork.
Cork is more durable and holds pins much more securely. damaging it.