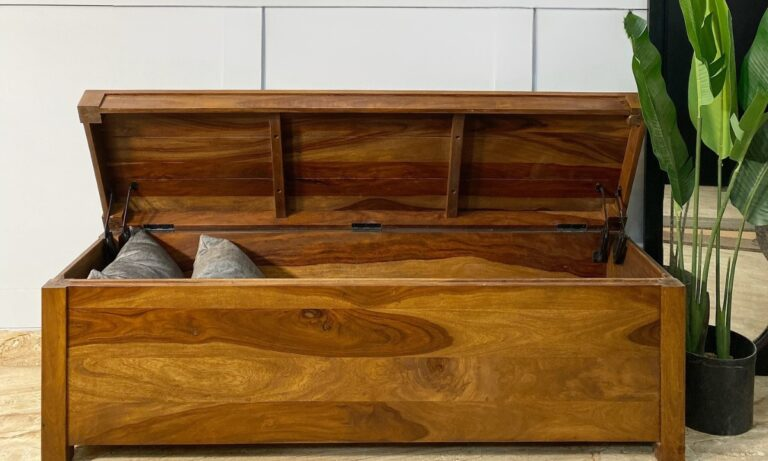
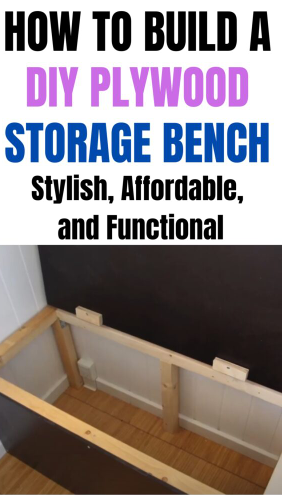
How to Build a DIY Plywood Storage Bench – Stylish, Affordable, and Functional
You need a place to sit and you also need more storage space.
Buying a bench from a store can be very expensive.
Often, the benches you find are not the right size for your home.
This is why building your own bench is a great idea.
You can make it fit your exact space and your personal style.
It will be strong, useful, and will not cost a lot of money.
This guide will show you every step in a simple way.
You will learn how to cut the wood and build a solid frame.
The finished bench will be a piece you are proud to own.
Why People Build a Plywood Storage Bench Themselves
Store-bought benches can be too weak or the wrong size.
They often do not fit perfectly in your entryway or bedroom.
Building your own bench solves all of these common problems.
Plywood is a strong material that does not cost much.
You can cut it to the exact measurements you need.
This gives you a custom piece of furniture for a low price.
You get both a comfortable place to sit and hidden storage inside.
It is a practical solution for any room in your house.
You save money and get exactly what you want.
Tools and Materials You Actually Need
You do not need a lot of fancy tools for this project.
Just gather these basic items before you begin.
Having everything ready makes the building process smooth.
Tools
A circular saw is the best tool for cutting the plywood.
You will need a drill to put all the pieces together.
A measuring tape ensures every cut is the right size.
A straight edge helps you mark perfect cutting lines.
Clamps hold the wood steady while you work.
A sander is used to make all the edges feel smooth.
Materials
One sheet of three-quarter inch plywood is usually enough.
You need wood screws in one-inch and two-inch lengths.
Wood glue makes all the joints much stronger.
Hinges are necessary for attaching the lid to the bench.
Wood filler hides the screw holes for a clean look.
Paint or stain protects the wood and makes it look beautiful.
Plan the Right Bench Size for Your Space
Take careful measurements of your space before you start.
This is the most important step to avoid mistakes.
You want your new bench to fit perfectly in its spot.
Measure the width of the area where the bench will go.
A comfortable sitting height is about eighteen inches.
A depth of sixteen to eighteen inches is ideal for most people.
Write all of your measurements down on a piece of paper.
Double-check each number to make sure they are correct.
Good planning makes the rest of the project much easier.
Step-by-Step: How to Build the Storage Bench Frame
Follow these steps in order to build a strong and square frame.
Do not rush through any of the important steps.
Taking your time now will give you a better final result.
Step 1: Cut the Plywood to Size
Use your plan to cut all the pieces from the plywood sheet.
You will need two side panels, a front, and a back panel.
You also need one piece for the bottom and one for the lid.
If you do not have a saw, the hardware store can cut it for you.
Make sure every piece is cut to the exact size you need.
Accurate cuts are the foundation of a well-built bench.
Step 2: Build the Box Frame
Connect the two side panels to the back panel first.
Use wood glue on the edges and then screws to hold them.
Clamps can keep the pieces steady while you drill.
Then, attach the front panel to the two side panels.
You should now have a simple open box shape.
Check that all the corners are square and even.
Step 3: Add the Bottom Panel
Place the bottom panel inside the frame you just built.
It should rest against the lower edges of all the panels.
Secure it firmly with wood glue and more screws.
This bottom piece makes the whole structure much stronger.
It also creates the base for your storage compartment.
Make sure it is flush and level with the bottom edges.
Step 4: Add Internal Support or Dividers
For a bench longer than three feet, add a center divider.
This piece of wood will stop the lid from sagging later.
It adds important strength right down the middle.
Place the divider in the center of the box.
Use a level to make sure it is perfectly straight.
Attach it with glue and screws at the top and bottom.
Step 5: Check All Joints
Look over the entire frame to make sure it is solid.
Tighten any screws that might feel a little bit loose.
Push on the frame to test for any wobbling.
If you find a weak spot, add another screw for support.
Let the wood glue dry completely before you move on.
A strong frame is the key to a long-lasting bench.
How to Reinforce the Bench So It Holds Adult Weight
You want to be sure the bench is safe for anyone to sit on.
Adding a center divider is the best way to prevent sagging.
This is especially important for wider bench designs.
You can also build a simple internal frame for extra strength.
Use one by three or two by two wood strips for this.
Attach them to the inside corners with glue and screws.
Always use both wood glue and screws for every connection.
The glue and screws work together to create a powerful bond.
Test the bench by sitting on it before you add the finish.
Install the Lid Without Gaps or Wobble
Place the lid on top of the bench frame to check the fit.
Line up the back edge of the lid with the back of the bench.
You should leave a very small gap so it opens easily.
Attach the hinges to the back of the lid and the back panel.
Butt hinges or one long piano hinge will both work well.
Screw the hinges in place firmly and check the movement.
Open and close the lid a few times to test the action.
It should open smoothly and stay level when it is closed.
You can add a lid support to hold it open safely.
Finishing Touches That Make It Look Store-Bought
Sanding is the secret to a professional-looking finish.
Start with a coarse sandpaper to remove any rough spots.
Then use a finer sandpaper to make the wood feel silky.
Use wood filler to cover all the visible screw heads.
Let the filler dry completely and then sand it smooth.
This step makes the bench look like it was store-bought.
You can paint the bench any color you like.
Staining the wood is another beautiful option.
Adding a cushion on top makes it more comfortable.
Conclusion of build a DIY Plywood Storage Bench
You have now built a strong and useful storage bench.
It gives you a place to sit and a place to hide your things.
You made it yourself, so it fits your space perfectly.
This project did not require expensive tools or materials.
You followed a clear plan and built something lasting.
Enjoy your new bench and the organized space it creates.