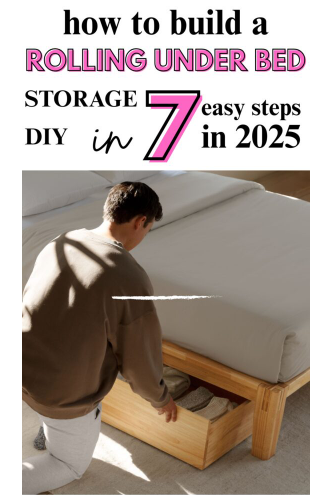
Rolling Under Bed Storage DIY for Small Apartments
Are you tired of pulling out a pile of random things from under your bed?
Maybe you have tried bins that bend, boxes that break, or storage that never rolls right.
It always feels like nothing truly fits or slides out the way you want.
The empty space under your bed can be useful, but only if the storage works well.
With carpet or a low bed, even good bins can get stuck or scrape your hands.
Making your own rolling box solves these problems and gives you a perfect fit.
The best part is that you do not need any building experience to try this project.
You can make a strong and smooth storage box with simple tools at home.
Once done, it looks neat, rolls easily, and fits your space exactly.
ChWhy You Need Rolling Under Bed Storage
If your bedroom feels crowded, using the space under the bed helps a lot.
It keeps things out of sight and gives you a place to store items you rarely grab.
Most people forget this space, even though it can hold so much.
Rolling storage makes it easy to pull things out without pulling your back.
Shoes, toys, clothes, and extra items stay organized and easy to reach.
It also keeps your shelves and closet from getting stuffed with clutter.
When you build your own box, you can adjust the size to fit your bed.
You can match the style to your room or make it simple and clean.
It becomes a custom storage solution made just for your home.
Tools and Materials You’ll Need
Before starting, gather everything in one spot so you can work smoothly.
You only need basic tools, and most of them are things people already have.
A little preparation saves time and prevents stopping in the middle of the job.
Tools:
Tape measure
Saw (hand saw or circular saw)
Drill and screwdriver
Sandpaper or sanding block
Pencil
Paintbrush (optional)
Materials:
Plywood or strong wooden boards
Four swivel caster wheels
Wood screws
Wood glue (optional)
Handle or drawer pull
Paint, stain, or peel-and-stick wallpaper
That is all you need to build a strong rolling storage box that works well.
Everything is simple, easy to find, and perfect for a beginner project.
Once you have these items ready, you can move to the next step.
How to Measure for a Perfect Fit
Measure the height from the floor to the bottom of your bed frame.
Subtract one inch so the box and wheels have room to roll freely.
This step is important because tight storage will not slide smoothly.
Now measure the length and width of the open space under the bed.
Avoid areas where the bed legs or support bars block the way.
You want a box that moves in and out without bumping anything.
Look under the bed for beams, wires, or stored items that could interfere.
Plan your box size based on the clear space that is actually usable.
Writing down your numbers helps prevent mistakes when cutting the wood.
Step-by-Step: Making a Rolling Under Bed Storage Box
Step 1: Cut the Wood
Use your measurements to mark and cut wood for the bottom and sides.
Check the numbers twice before cutting to avoid wasting material.
Cut slowly so the edges stay clean and straight.
Step 2: Sand the Edges
Smooth any rough edges so the wood feels safe to handle.
This prevents splinters and gives the project a neat look.
Sand both inside and outside corners for the best results.
Step 3: Build the Box
Attach the sides to the bottom piece using screws and a drill.
Adding wood glue along the edges makes the box stronger.
Make sure each corner stays straight and firm.
Step 4: Attach the Casters
Turn the box upside down and place a wheel on each corner.
Screw them in tightly and check that they spin freely.
Good wheels make rolling storage smooth on any floor.
Step 5: Add a Handle
Flip the box upright and attach the handle to the front side.
This makes pulling the box from under the bed much easier.
Any type of handle works as long as it feels comfortable.
Step 6: Finish the Look (Optional)
Paint or stain the box if you want a polished style.
You can also decorate the inside with wallpaper or fabric.
A little finishing makes the box look store-bought.
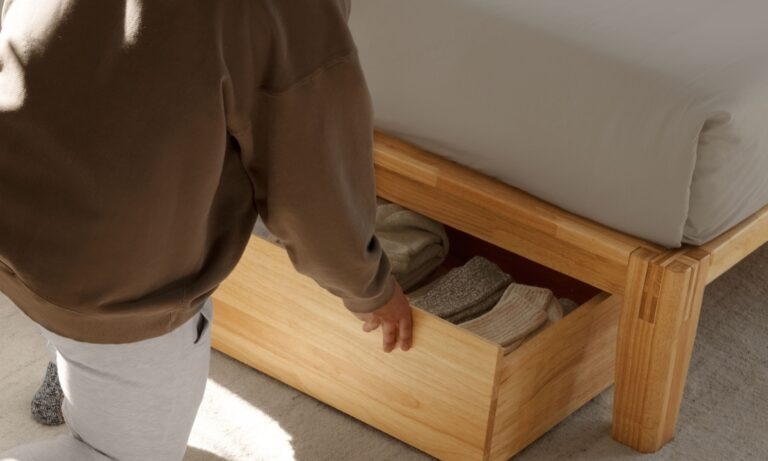
Step 7: Load Up and Roll
Let everything dry before placing your items inside.
Slide the box under your bed and enjoy the extra space.
Your storage is now easy to reach and simple to use.
Mistakes to Avoid for a Smooth DIY
Not measuring correctly can make the box too tight or too loose.
Make sure you subtract an inch from the height for easy movement.
Double-check length and width so the box does not get stuck.
Using weak wood can make the box bend under weight.
Choose strong plywood or solid boards for a lasting build.
Good wheels also matter, especially for carpeted floors.
Skipping sanding or finishing leaves rough edges that catch on things.
Sanding helps paint stick better and makes the box look clean.
Tighten wheel screws well so the casters do not wobble.
Problems People Face With Under Bed Storage
Many bins fit awkwardly and waste space under the bed.
Plastic bins crack over time, and cardboard boxes gather dust.
Hard wheels sometimes make noise or refuse to roll on carpet.
Low beds make it hard to grab things without scraping your hands.
Pulling boxes becomes annoying when they keep getting stuck.
Dust also builds up easily, making storage musty or messy.
Conclusion of Rolling Under Bed Storage DIY
You do not need to fight with boxes that jam or break anymore.
With a simple rolling storage box, you can use the space under your bed wisely.
It helps you stay organized without taking up room in your closet.
This project is easy even for beginners and only needs basic tools.
When you size it correctly, it rolls smoothly and fits perfectly.
Follow the steps and you will have storage that works for you every day.