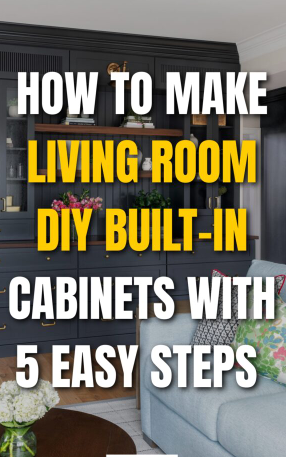
How to Make a Living Room DIY Built-In Cabinets with 5 Easy Steps
Does your living room always feel messy? Store-bought bookshelves often take up too much space without looking nice. Custom built-in cabinets are usually too expensive.
This is why many people decide to build their own. You can create storage that fits your space perfectly and looks great. But knowing how to start can feel challenging.
This guide will walk you through the entire process. You will learn how to pick the right wall and how to add trim for a professional look.
Why DIY Built-Ins Make Sense Today
Built-in cabinets are not just for large, expensive homes. If you have a small space and are tired of furniture that does not match, built-ins are a smart solution.
They give you storage that fits your wall exactly. They look polished and can save space compared to large, freestanding furniture.
You also get to control the final cost. By using simple materials, you can get a high-end look without a high-end price. You can design them to hold your TV, books, or toys.
Built-ins help you reduce clutter and add style. They combine function and good design without costing too much money.
Choose the Right Wall and Built-In Type
You should pick a wall with a clear purpose. The best places are behind your TV, next to your fireplace, or around a window.
Do not choose awkward corners or narrow pathways. Built-ins in these spots can block movement and feel out of place.
A full-wall built-in is great for a long, empty wall in a big room. For a smaller room, choose tall, narrow shelves on the sides of a window or sofa.
Design the built-in based on what you need. Use cabinets with doors to hide items. Use open shelves to display decorations. You can also use a mix of both.
Try to keep the look balanced. If you are building around a TV, make the shelves on both sides the same. Remember to leave space for electronics and other items.
Materials and Tools You Actually Need
You do not need expensive tools or expert skills for this project. You can use affordable materials from a home improvement store.
Good choices are medium-density fiberboard, plywood, or stock cabinets that are already put together. These materials are smooth, easy to cut, and paint well.
You will need some basic tools for the job. A drill and wood screws are essential. A level keeps your shelves straight. A stud finder helps you attach things safely to the wall.
You will also need wood glue and clamps. A miter saw or box helps you cut corners. Caulk, primer, and paint give you a finished, professional look.
The goal is to make straight cuts and keep everything level. You need to secure the frame firmly to the wall.
Build the Base Because Foundation is Important
A strong and level base is the most important part. It supports everything you build on top of it. A crooked base will lead to crooked shelves.
Step 1: Mark Your Base Area
First, use a pencil and a level to mark on the wall where the cabinet will sit. Check your measurements very carefully.
Make sure the area is square and centered exactly where you want the finished built-in to be.
Step 2: Build/ Place the Base Frame
If you are using stock cabinets, build a simple platform from pieces of wood. This raises the cabinets and creates a space for your toes.
If you are building from scratch, cut plywood to make a base box. This box should be the same length and depth as your planned built-in.
Step 3: Level Everything Out
Use a long level to check if the base is flat. If your floor is uneven, use thin pieces of wood called shims to fix it.
Do not skip this step. A level base is critical for the entire project to look right and be stable.
Step 4: Secure the Base to the Wall and Floor
Drill through the back of the base into the wall studs. Use long wood screws to make a strong connection.
Make sure everything feels solid and does not move or wobble when you push on it.
Step 5: Leave Space for Trim
If you want to add decorative trim later, push the base back from the front edge a little. This small gap makes it easy to add trim for a seamless, custom look.
Add Shelves and Supports Like a Pro
Start by building the vertical side panels from plywood. These panels form the structure and will hold your shelves.
Attach these side panels to the wall studs with wood screws. Use your level to make sure they are perfectly straight up and down.
Use thick plywood for your shelves. This thickness keeps them strong and prevents them from sagging in the middle over time.
Before you attach anything, mark the height for each shelf on both side panels. This ensures all your shelves will be straight and evenly spaced.
Add small wood strips, called cleats, under each shelf. These make the shelves very sturdy and are easy to install.
You can add a trim board to the front edge of each shelf. This gives the shelves a clean, finished, and professional appearance.
Plan the space between your shelves carefully. A good distance for books and decor is about twelve to fifteen inches.
For taller items, use eighteen inches or more. Do not make shelves longer than thirty-six inches without a support in the middle.
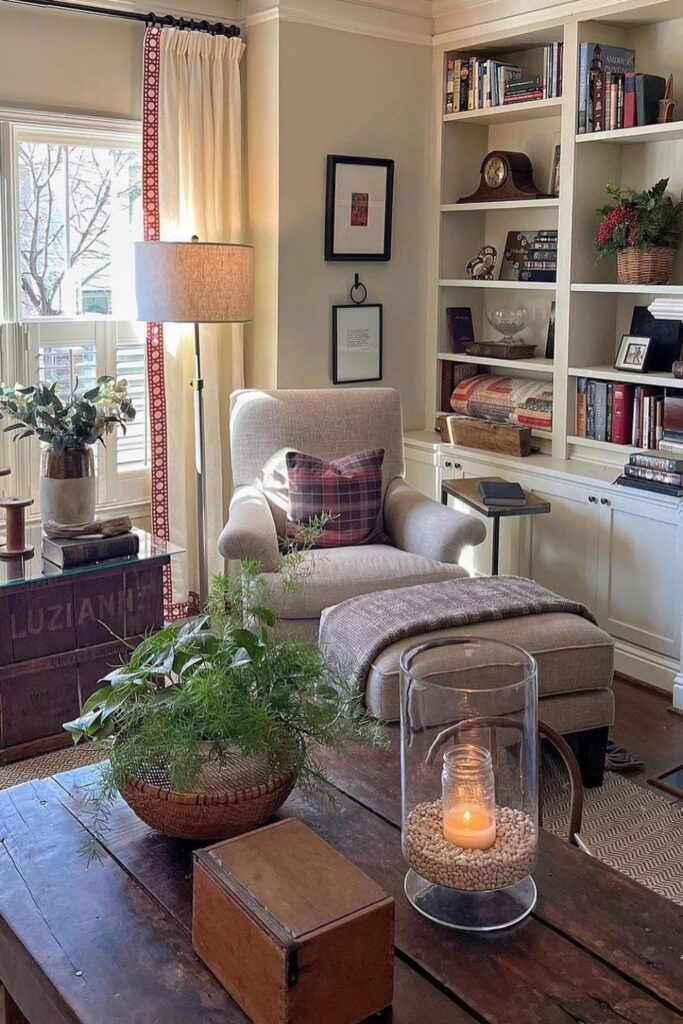
Make It Beautiful: Styling Tips That Works
Group your items in sets of three. For example, use a vase, a framed photo, and a stack of books. This looks balanced and interesting.
Mix items of different heights and shapes. Place a tall object next to a shorter one. This creates depth and makes the display more dynamic.
Do not fill every single space. Leave some empty areas on the shelves. This helps your eyes focus on the items you have displayed.
Stick to just two or three main colors. This makes the shelves look organized and tidy. Use baskets on lower shelves to hide things like remote controls.
Stack your books in both horizontal and vertical piles. This adds variety and structure to your shelves.
Built-In Ideas for Every Space
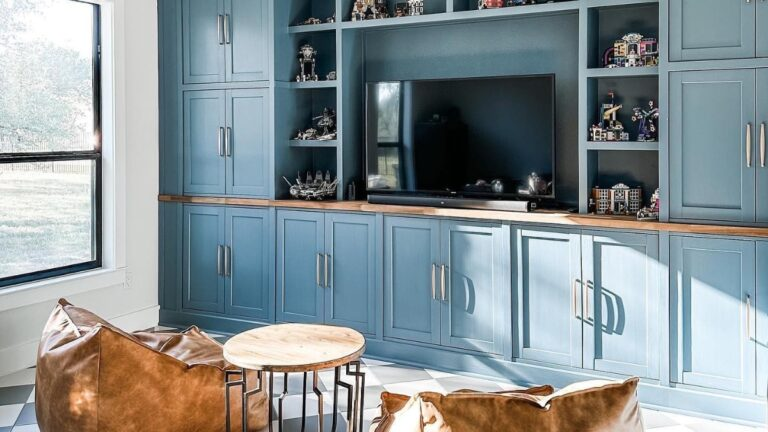
For a TV wall, add shelves or cabinets on both sides of the television. This creates a balanced and clean entertainment center.
Use the space on both sides of your fireplace. Built-ins here create symmetry and give you valuable storage space.
A full wall of built-ins is perfect for a large, blank wall. Floor-to-ceiling shelves with base cabinets use all the available space.
You can install narrow built-ins on each side of a window. This adds storage without blocking the natural light from the window.
For a small corner, use tall shelves or cabinets with doors. This is a great way to use space that is often wasted in a living room.
Don’t Mess Up These Common Steps
Always make sure your base is perfectly level before you build on top of it. Always find the wall studs and drill into them for a secure hold.
It is much easier to paint all of your wood pieces before you assemble them. Always use wood screws, as they create a very strong connection.
Remember to leave space for your trim pieces as you build. Double-check every measurement before you make a cut.
Do not forget to use shims to fix any uneven spots on your floor or wall. This prevents problems later.
Conclusion to Make a Living Room DIY Built-In Cabinets
You do not need a professional or a huge budget to build beautiful built-in cabinets. With good planning and the right materials, you can do it yourself.
You can create a design that fits your space and meets your storage needs. You now have the knowledge to build something that adds function and style to your home.
It will look so good that it seems like it was always a part of your house.