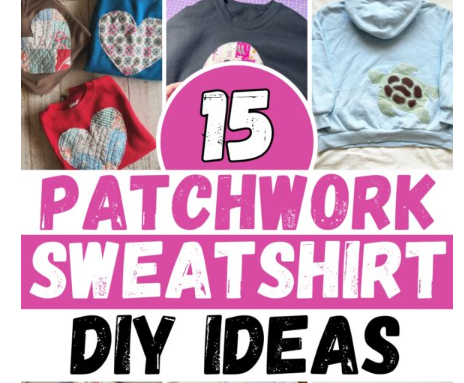
15 Patchwork Sweatshirt DIY Ideas for 2026
Working with sweatshirts can feel easy at first, but problems often appear after stitching.
Fabric can stretch, stitches may sink, and designs sometimes lose their shape once removed from the hoop.
This happens because sweatshirt fabric is thicker and more flexible than it looks.
In this guide, you’ll learn which stabilizer works best for sweatshirts.
You’ll also explore patchwork sweatshirt DIY ideas that hold their shape and look clean in 2026.
Each idea focuses on balance, layering, and simple construction that lasts.
What Stabilizer Should I Use to Embroider a Sweatshirt?
Cut-away stabilizer is the best choice for embroidering sweatshirts.
Sweatshirt fabric stretches, and stitches need long-term support after stitching is finished.
If support is removed, the design can shift, wrinkle, or stretch out.
Tear-away stabilizer does not work well here because it is removed completely.
Once it’s gone, nothing supports the stitches during washing or wearing.
This often causes embroidery to look uneven over time.
For thick fleece sweatshirts, one layer of medium or heavy cut-away stabilizer is usually enough.
If the design is large or dense, a heavier stabilizer or two layers may be needed.
The basic rule is simple: when fabric stretches, the stabilizer must stay behind.
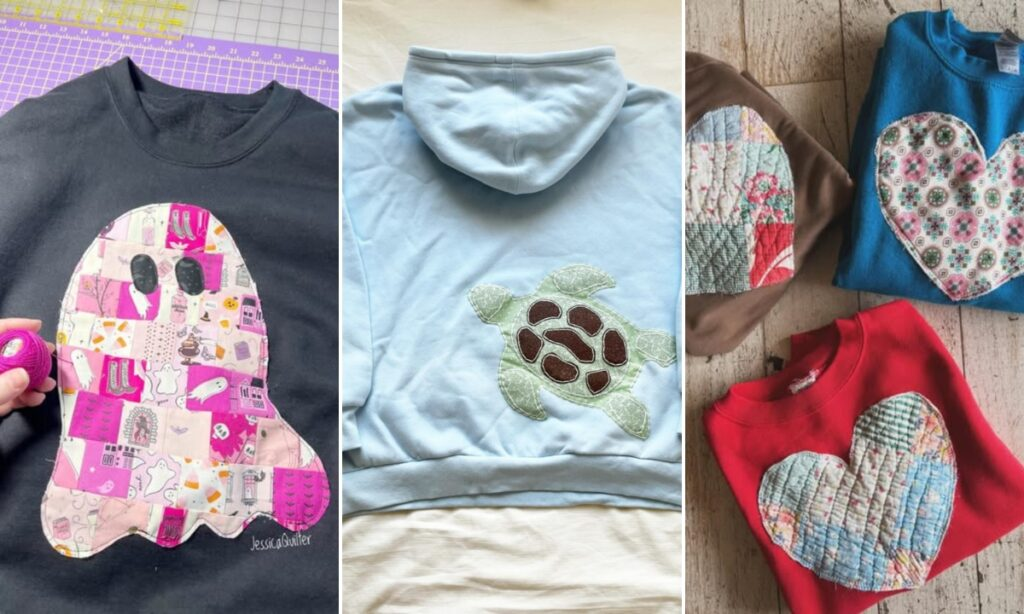
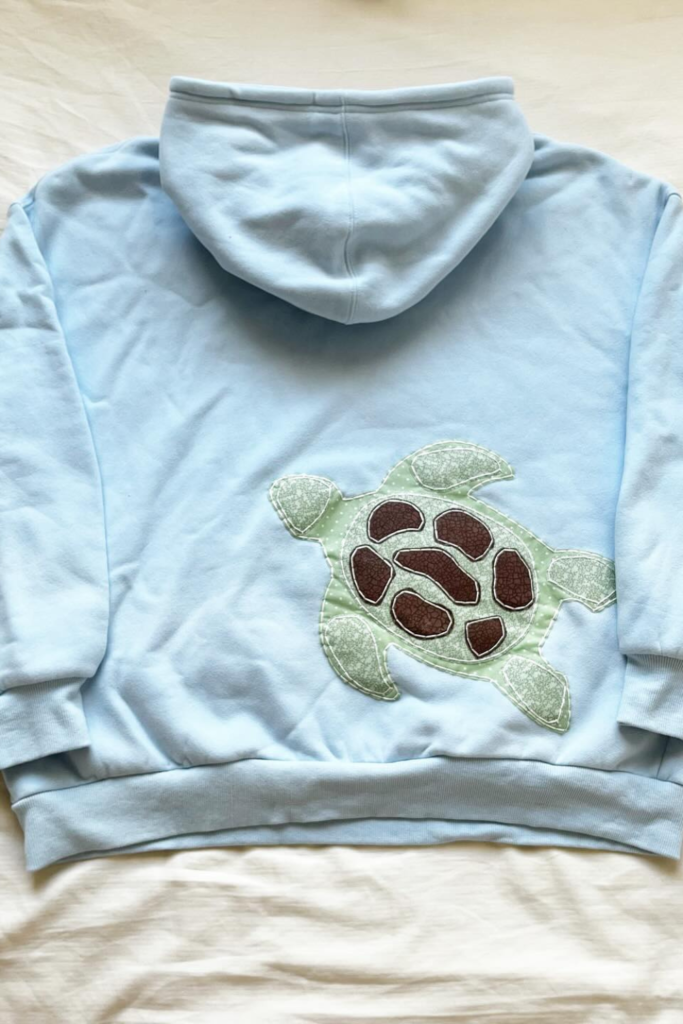
Appliqué Back Motif
Large back appliqué designs work best on simple, solid sweatshirts.
Keeping the base clean helps the patchwork stand out without looking busy.
Using fusible web keeps all layers in place before stitching.
Start by cutting the main shape from cotton fabric.
Add smaller fabric pieces on top to create detail and depth.
Stitch around each section to secure everything.
Light embroidery stitching around the edges adds shape and structure.
It keeps the design flexible and comfortable for daily wear.
This method avoids stiffness while keeping the appliqué secure.
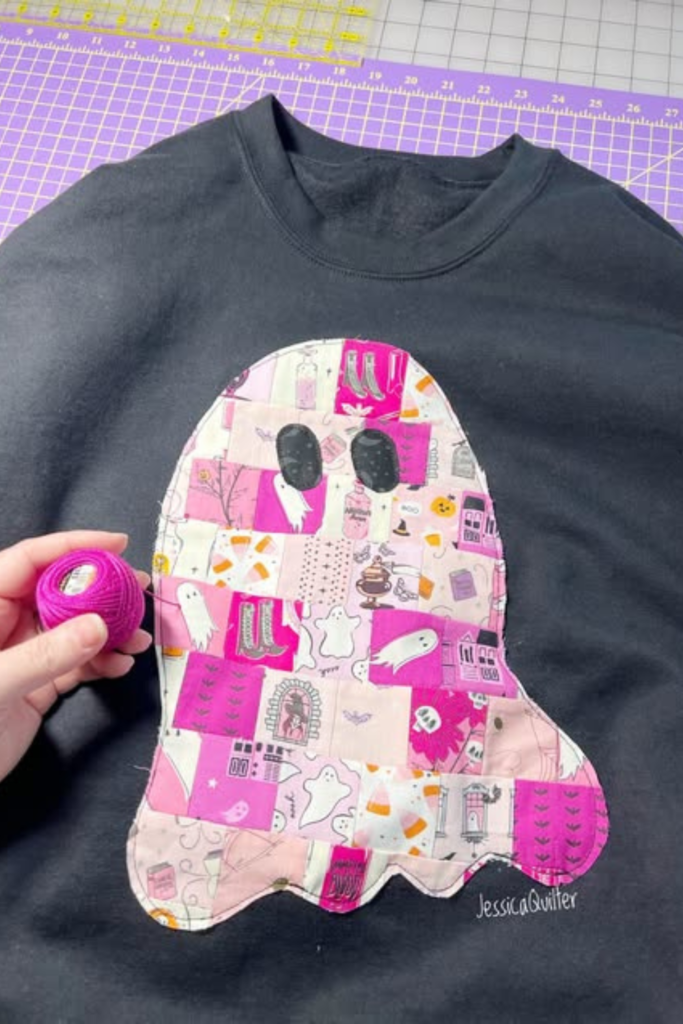
Patchwork Character Panel
Bold character designs look best on the front of plain sweatshirts.
The clean background helps the patchwork shapes stay clear and readable.
Small fabric scraps are joined to build the full design.
Once the patchwork looks balanced, cut the final shape.
Fuse it onto the sweatshirt to stop movement during stitching.
Stitch around the edges to lock it in place.
The layered look comes from fabric sitting on top of the sweatshirt.
Simple outline stitching keeps the design neat and wearable.
This approach works well for graphic and playful styles.
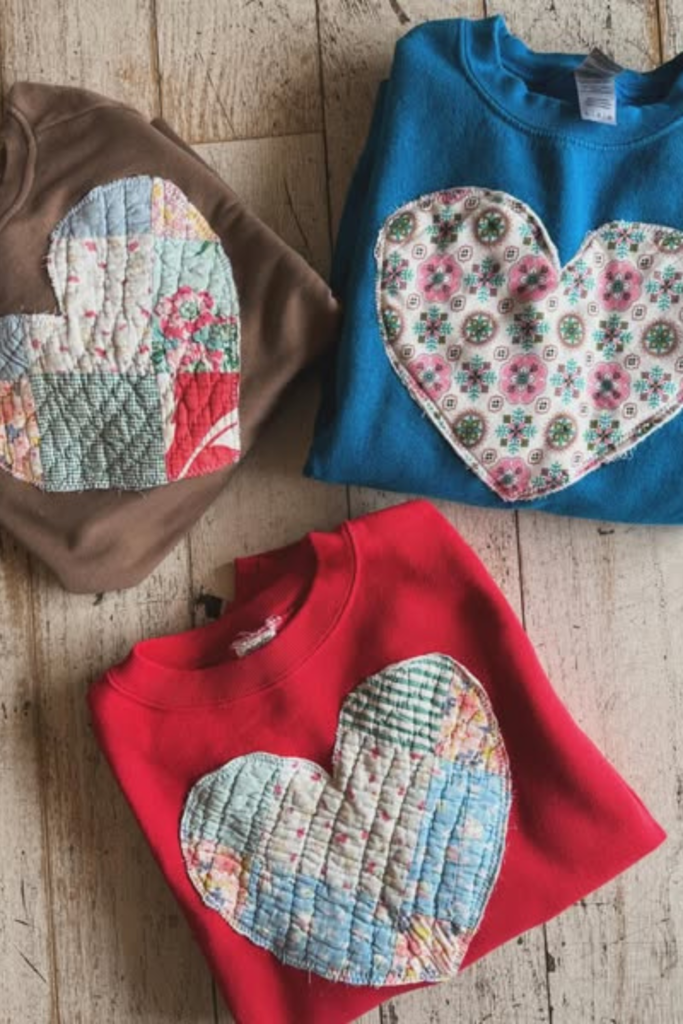
Quilted Heart Patch
Quilted heart patches work best on the chest area.
This spot stays flat and keeps the design visible while wearing.
Small quilt scraps are pieced together first.
Add a thin batting layer underneath the patchwork.
Quilt the panel before attaching it to the sweatshirt.
Once finished, trim the shape into a heart.
Secure the heart with tight edge stitching.
The batting adds depth without making the design bulky.
This layered method holds up well with regular wear.
Colorblock Statement Hoodie
Colorblock designs fit oversized hoodies very well.
Large panels don’t fight the shape of the garment.
Bold fabric choices create a strong visual impact.
Cut the main fabric sections for sleeves and body first.
Assemble the hoodie panels before adding any appliqué.
This keeps seams clean and aligned.
The layered look comes from stacked sweatshirt fabrics.
Contrast knits and stitched appliqué sit neatly on top.
This method keeps the hoodie structured and modern.

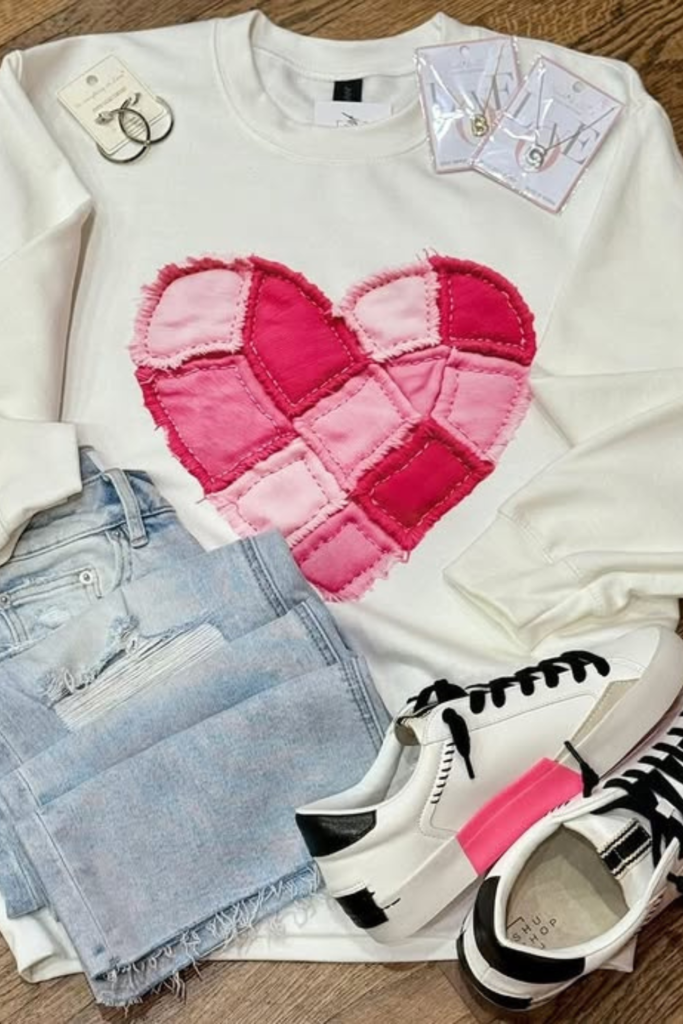
Raw-Edge Heart
Start by joining small fabric squares together.
Once joined, cut the final heart shape.
Attach it directly to the sweatshirt.
Leave the edges unfinished on purpose.
Over time, the fabric will soften and fray naturally.
This adds texture without heavy quilting.
Dense stitching keeps the heart secure.
The stable sweatshirt base controls excess fraying.
This style works well for casual, relaxed designs.
Wreath Patch Layout
Circular patch layouts work best on the center chest.
This placement keeps the design balanced and noticeable.
Fusing the full circle first helps with alignment.
Cut wedge-shaped pieces from different fabrics.
Arrange them into a ring before attaching anything.
This step helps adjust spacing and color balance.
Stitch each piece down individually.
The layered look comes from cotton patchwork on the sweatshirt.
Cut-away stabilizer underneath keeps everything flat.

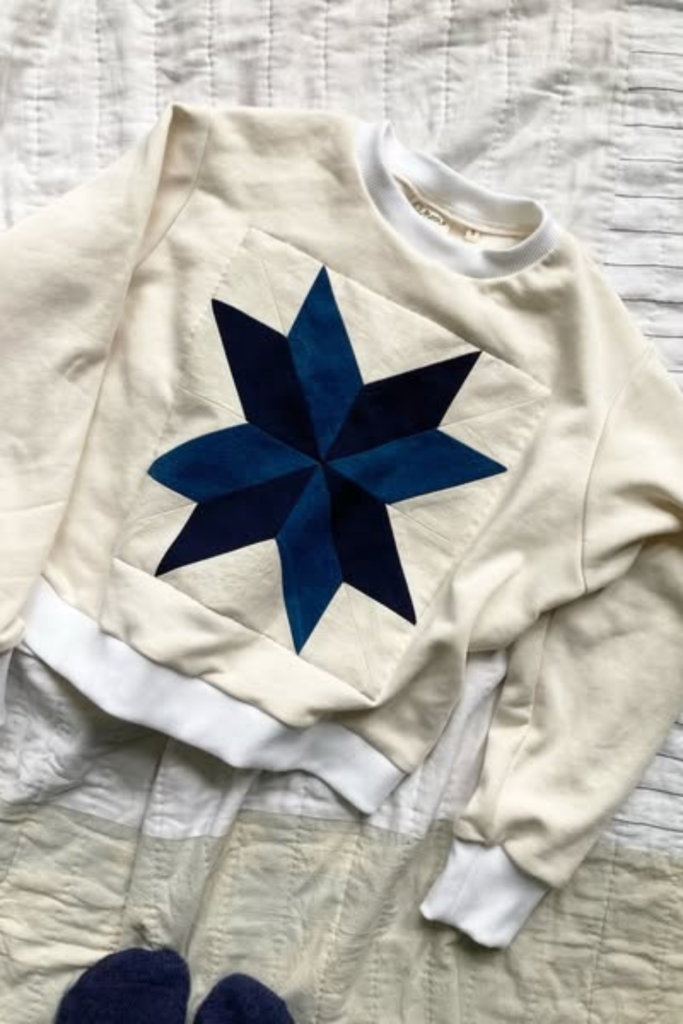
Geometric Quilt Star
Geometric stars look best when placed at the center front.
Sharp shapes need a flat surface to stay clean.
The finished block should be attached as one unit.
Piece the star on a separate fabric panel first.
This helps keep angles straight and accurate.
Once complete, fuse and stitch it onto the sweatshirt.
The layered effect comes from quilt cotton over the base fabric.
Cut-away stabilizer prevents stretching and distortion.
This method keeps lines crisp after washing.
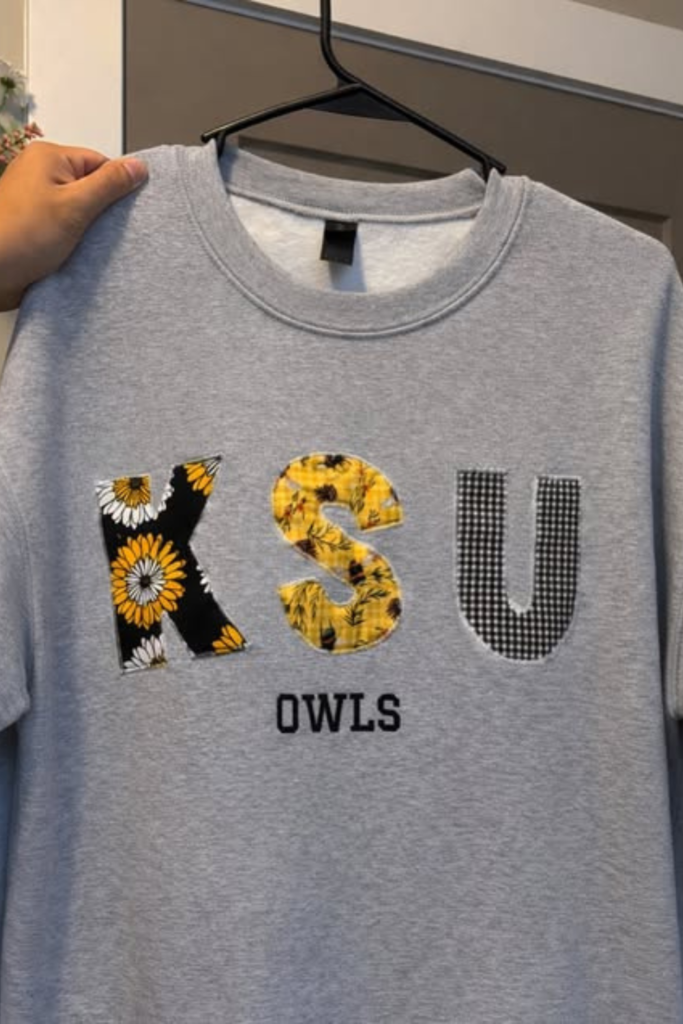
Patchwork Name Letters
Fabric letters stand out best across the front.
This area stays smooth and keeps letters readable.
Each letter is built from scrap fabric pieces first.
Once balanced, cut clean letter shapes.
Fuse them onto the sweatshirt to stop shifting.
Stitch around each letter for definition.
The layered look comes from cotton letters sitting on the base.
Tight stitching outlines keep edges clean.
This design stays durable with regular wear.
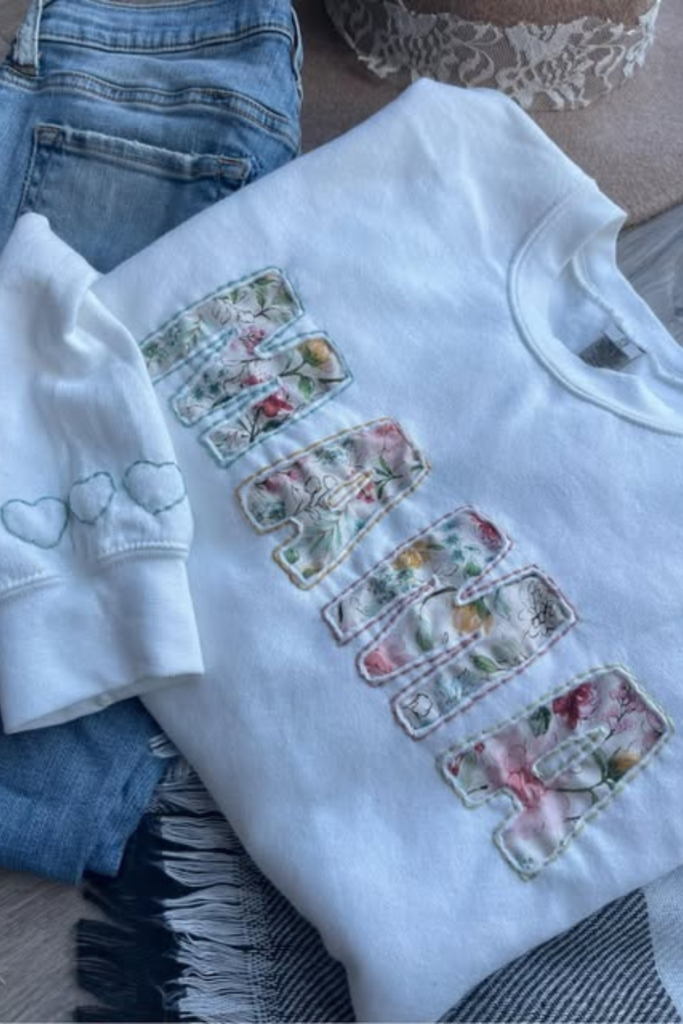
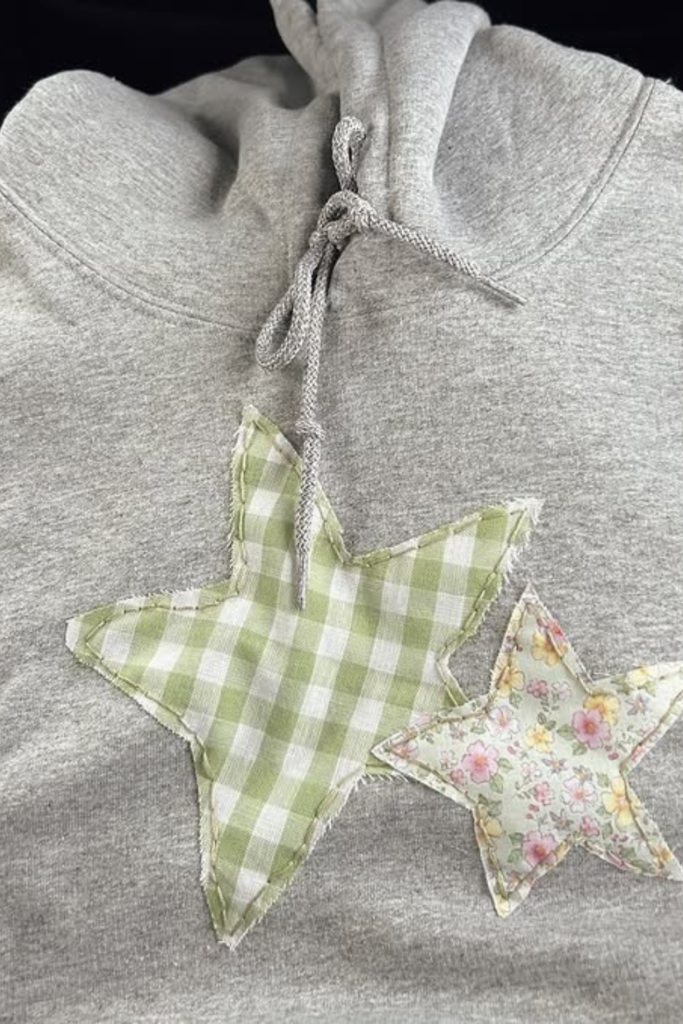
Layered Star Patches
Star patches work well near the neckline or upper chest.
This placement keeps them from feeling crowded.
Different sizes help create depth.
Cut stars from contrasting scrap fabrics.
Stack them from largest to smallest.
Fuse before stitching to keep alignment.
Edge stitching secures each layer.
Cut-away stabilizer adds support underneath.
This method keeps the layered effect neat.
Phrase Patch Letters
Start by joining scraps into small fabric panels.
Then cut each letter cleanly from the panels.
This prevents patterns from feeling messy.
Fuse letters in place before stitching.
This locks spacing and keeps words straight.
Phrase designs work best across the chest.
Outline stitching adds clarity.
The smooth sweatshirt base supports the letters.
This keeps the message readable and long-lasting.

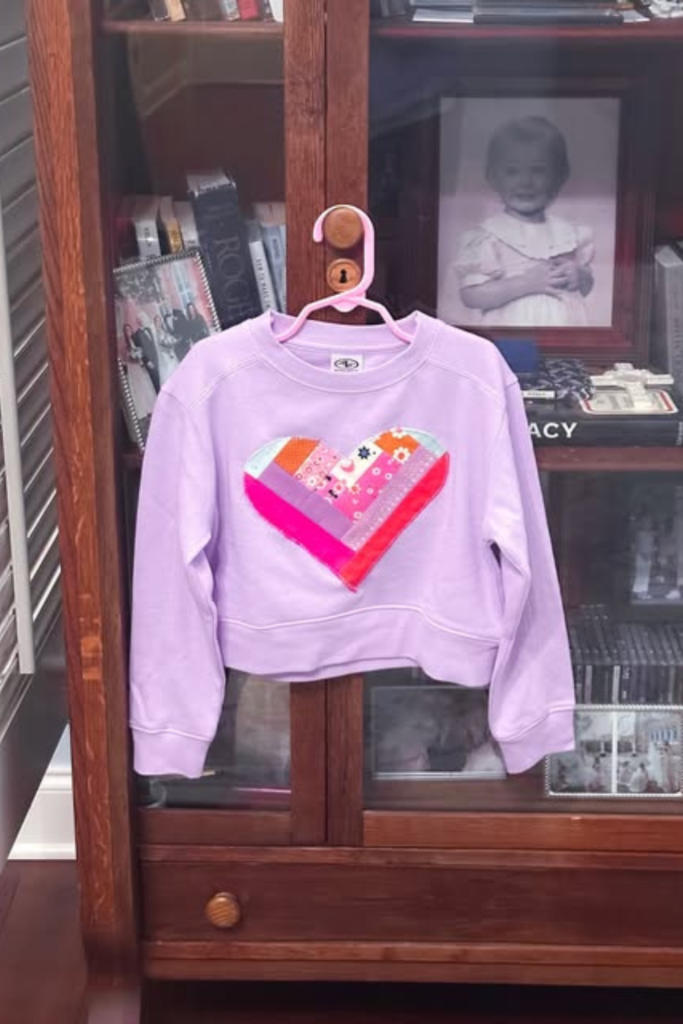
Scrappy Heart Block
Small scrappy hearts suit cropped or youth sweatshirts.
The centered design feels playful and balanced.
Narrow fabric strips are joined first.
Once the block looks even, cut the heart shape.
Attach it as a single panel.
This keeps the design stable.
Clean stitching around the edges secures it.
Patchwork fabric sits flat on the sweatshirt.
This style stays light and comfortable.
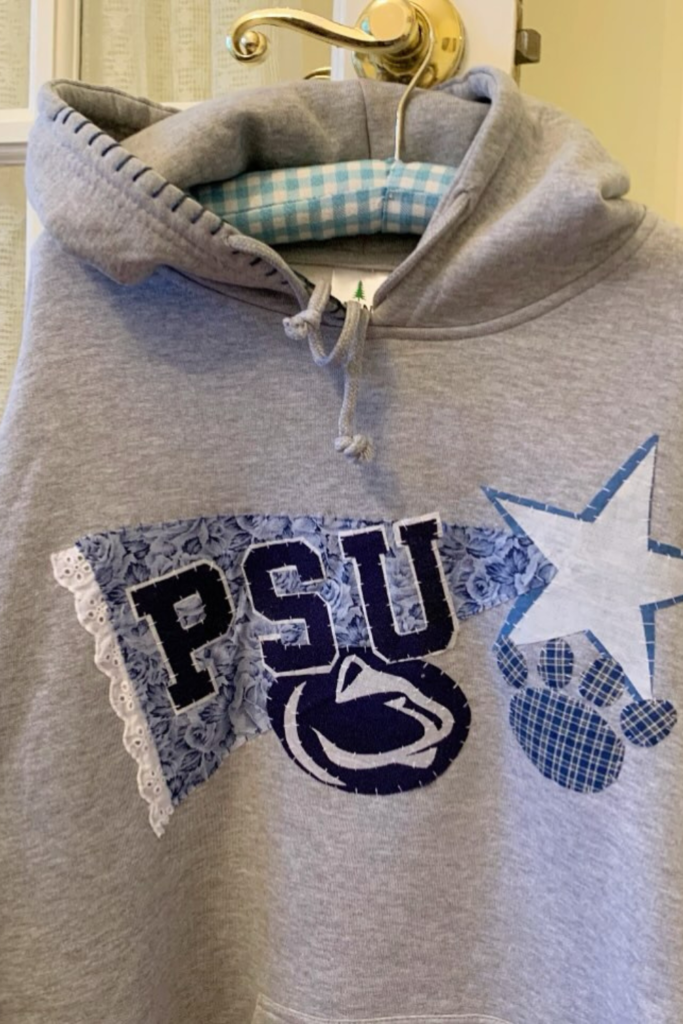
Mixed Logo Patch
Logo-based patchwork works well on hoodies.
The front panel stays flat and visible.
Start with an existing logo design.
Frame the logo using scrap fabric shapes.
Attach the background fabric first.
Layer the logo on top to keep it clear.
Dense stitching anchors everything.
Cut-away stabilizer supports the layers underneath.
This keeps the logo readable over time.
Mixed Fabric Letters
This style works best on mid-weight sweatshirts.
The front panel stays flat and smooth.
Each letter is cut from a different fabric.
Keep patterns separate so they don’t clash.
Fuse letters before stitching to lock spacing.
Then stitch around each shape.
The layered look comes from individual fabric pieces.
Clean edge stitching adds strength.
This design holds up with frequent wear.
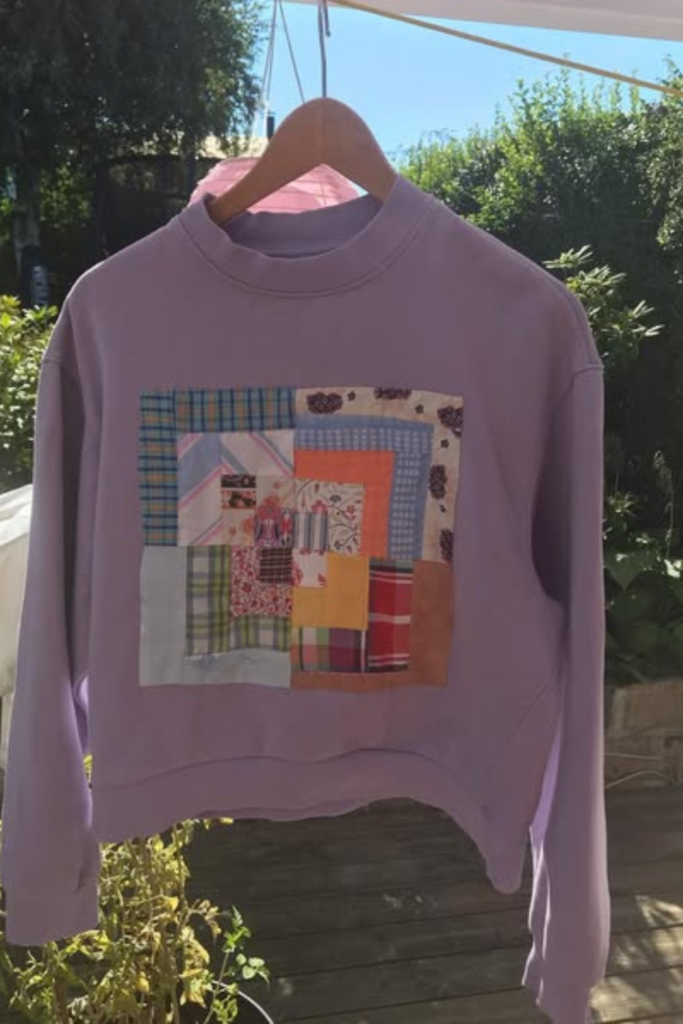
Center Patch Panel
Build the patchwork off the garment first.
Stack fabric frames inward until balanced.
This gives better control over shape.
Square panels work best on cropped sweatshirts.
Attach the finished panel as one piece.
This avoids uneven stitching.
Multiple cotton layers sit over the base fabric.
Stitch the panel down cleanly.
Cut-away stabilizer keeps everything stable.
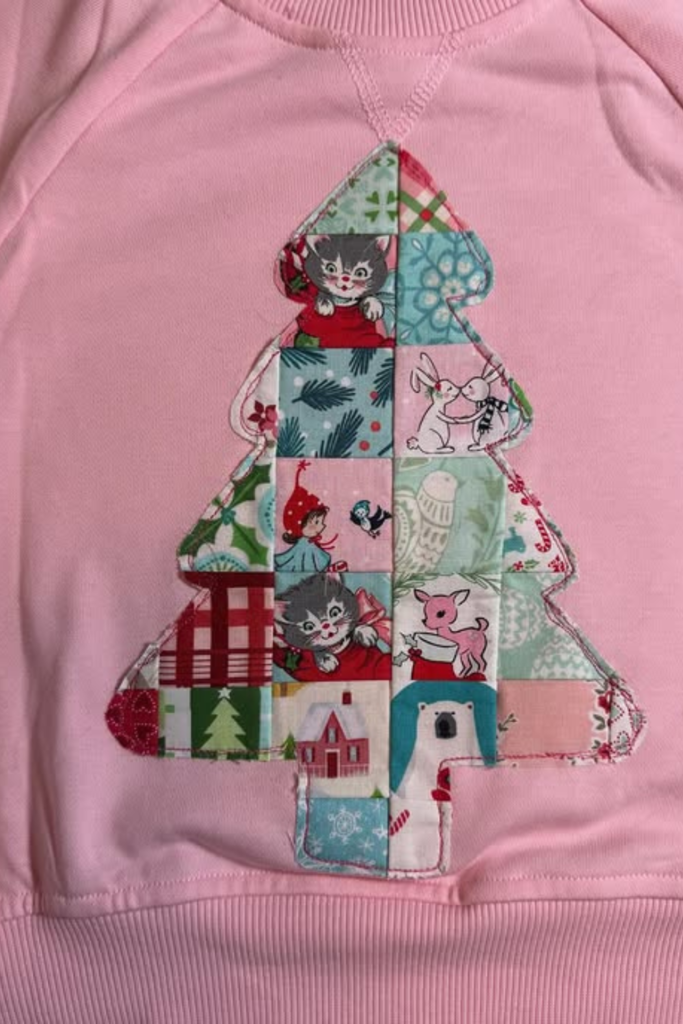
Patchwork Tree Shape
Seasonal shapes work best as single panels.
Piece small fabric squares together first.
Then cut the full tree shape.
Attach the shape as one unit.
This keeps the design balanced and visible.
Outline stitching secures the edges.
Patchwork fabric sits over the sweatshirt base.
Cut-away stabilizer supports the stitching.
This helps the shape keep its form.
FAQs
Can I embroider a sweatshirt without stabilizer?
Skipping stabilizer usually causes issues.
Sweatshirt fabric stretches easily.
Stitches need support to stay flat.
Even small designs benefit from cut-away stabilizer.
If fabric stretches, something must stay behind.
This controls movement and distortion.
Should I hoop the sweatshirt or float it?
Hooping works for stable, low-bulk sweatshirts.
Thick or oversized styles are easier to float.
Secure the stabilizer in the hoop first.
Attach the sweatshirt using adhesive or basting stitches.
Floating reduces hoop marks.
It also lowers fabric distortion during stitching.