20 Sewing Easy DIY Ideas Anyone Can Do at Home in 2025
Learning to sew can feel very frustrating at first. Many beginners think it will be simple but end up with tangled thread and messy projects. It is easy to feel like you should just give up.
The problem is that many tutorials skip the small but important steps. They do not explain the basics that make sewing work well. This leaves people feeling confused and disappointed.
This guide will show you the simple tools you actually need to begin. You will learn easy projects that build real skills. It also includes quick fixes for common mistakes so you can keep sewing and get Sewing Easy DIY Ideas
What do you really need to start sewing?
When you are new to sewing, the store has many tools that can be confusing. You might feel like you need to buy everything you see. This is not true at all.
You only need a few basic items to get started. A simple sewing machine that does straight and zigzag stitches is perfect. You also need sharp fabric scissors, pins or clips, and a measuring tape.
It also helps to have an iron nearby. Pressing your fabric as you sew makes your work look neat and professional. You can ignore fancy tools like rotary cutters for now. Learning with simple tools is the best way to start.
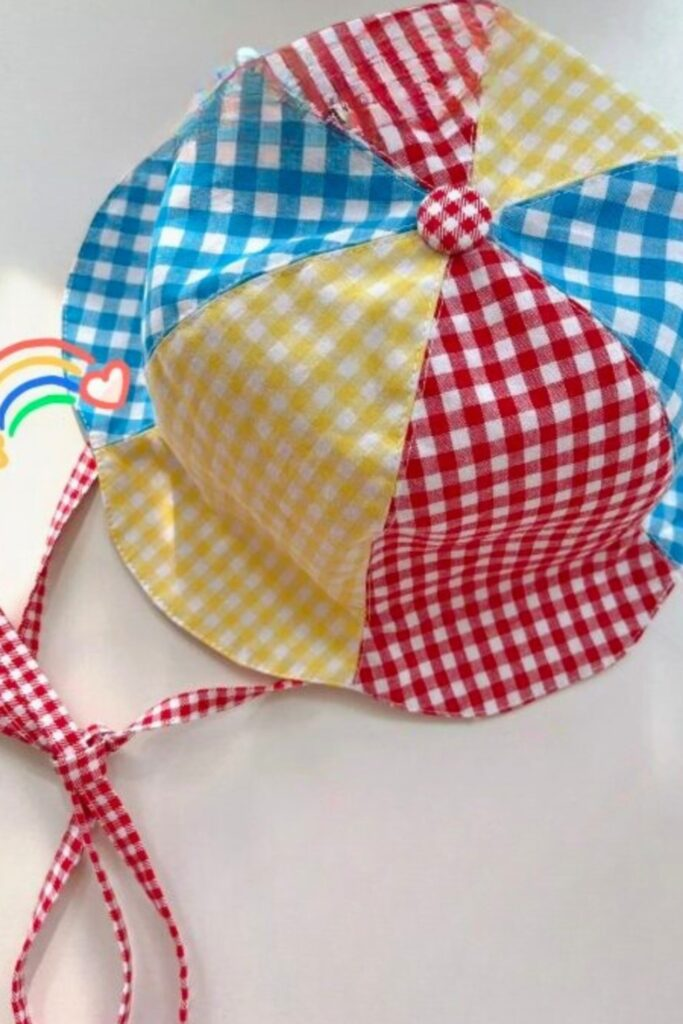
Patchwork Bucket Hat of Sewing Easy DIY Ideas
You can make a fun and colorful bucket hat by sewing fabric pieces together. Cut several same-sized wedges from different gingham fabrics. Sew these wedges together to form the crown of the hat.
Using cotton fabric is a good idea because it is strong and holds its shape. If you want a heavier hat, you can add a lining inside. The chin straps are useful for keeping the hat on during windy days.
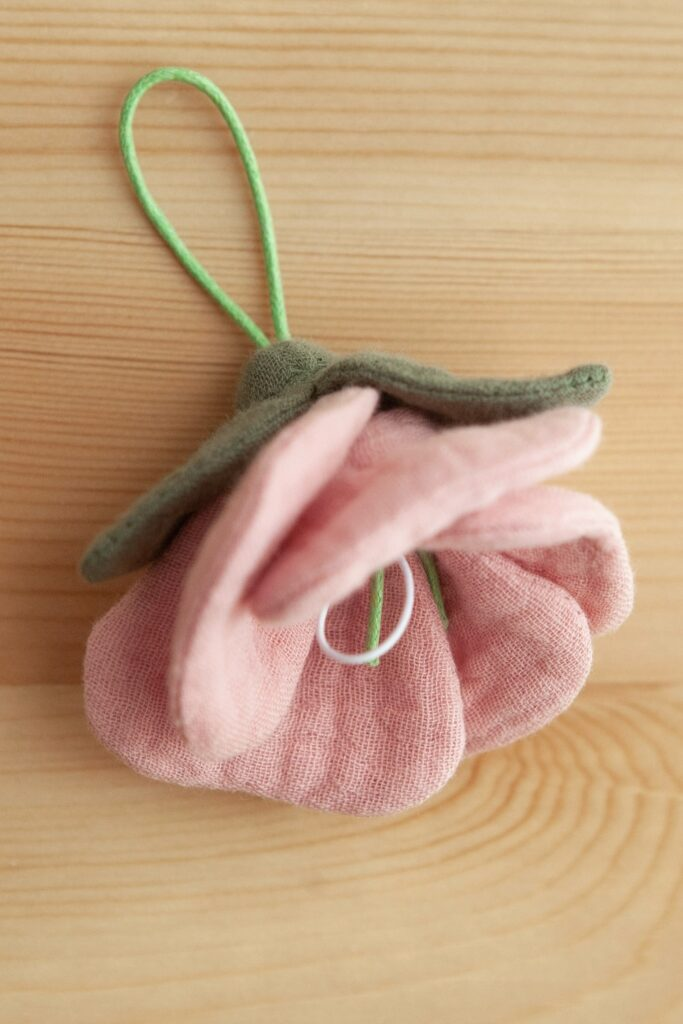
Fabric Flower Charm
A fabric flower charm is a small and pretty decoration for bags or keys. Cut petal shapes from soft cotton or linen material. Sew along the edges and pull the thread to gather the petals into a flower.
Add a small green fabric piece to look like leaves at the bottom. Attach a loop made from cord or ribbon so you can hang it anywhere. This is a very quick and satisfying project.
Quilted Vest DIY
A quilted vest is a great project after you master straight seams. Use cotton fabric and a layer of batting for warmth. Sew lines through all the layers to create the quilted pattern.
The vest ties at the front, so you do not need to learn zippers or buttons. You can add patch pockets to the front for holding small items. Finish the edges with bias tape for a clean and professional look.

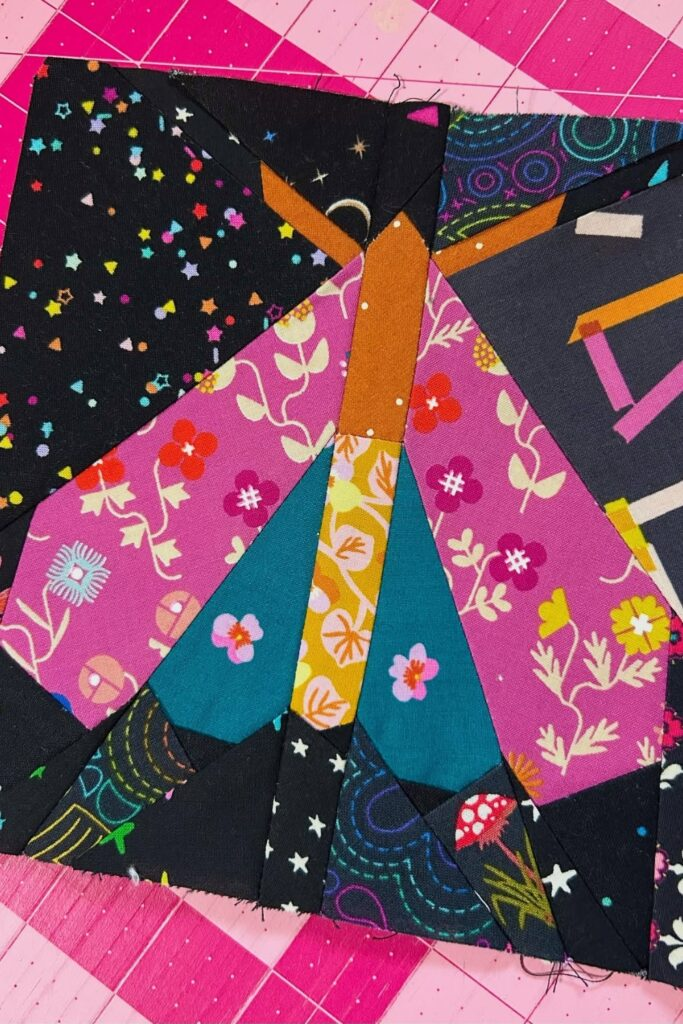
Patchwork Butterfly Block
This patchwork butterfly block adds a beautiful design to your projects. Cut bold printed fabric into specific shapes. Use the foundation paper-piecing method to keep your angles sharp and accurate.
Sew the pieces together to form a butterfly shape. The bright wings look amazing against a dark background. You can use this block in a quilt or as a wall hanging for decoration.
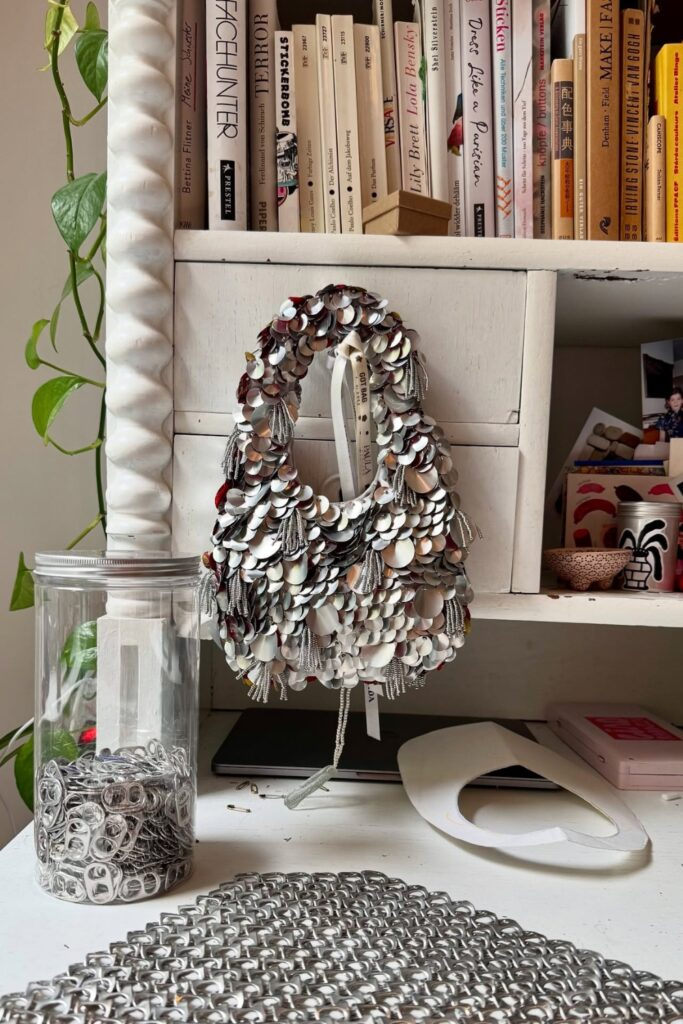
Pop Tab Statement Bag
You can create a unique bag by recycling soda can tabs. Collect many clean pop tabs and connect them with strong crochet thread. This will form panels for the sides of your bag.
Sew or crochet the panels together to create the bag shape. Adding a fabric lining inside makes the bag stronger and more useful. The shiny layers give it a special and eco-friendly style.
Embroidered Butterfly Pillow Toy
This project combines embroidery with soft sewing. Start by stitching a butterfly design onto your fabric. Then sew the front and back pieces together, leaving a small opening.
Stuff the pillow lightly to make it soft and cuddly. Attach a ribbon loop at the top for hanging. You can also add a teething ring or a small handle at the bottom for little hands.

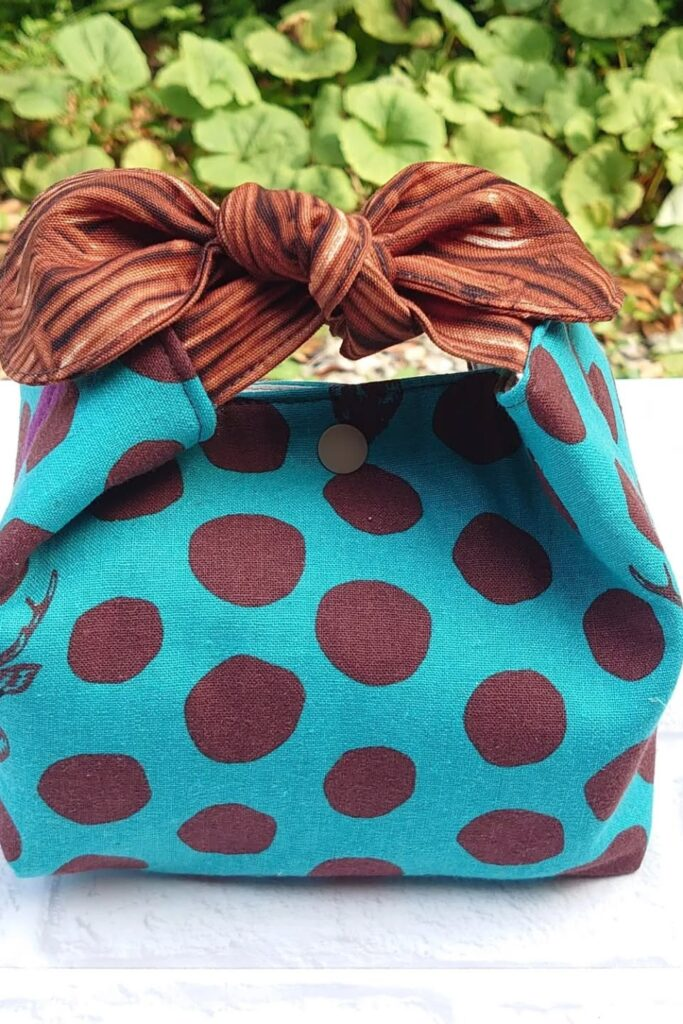
Knot-Handle Lunch Bag
This lunch bag is clever because the handle is made from the bag itself. Cut two rectangles from sturdy cotton fabric. Sew them together to form a simple box shape with a lining.
The fabric at the top is extra long on each side. You simply tie these extended pieces into a knot to create the handle. There is no need for any extra hardware or parts.
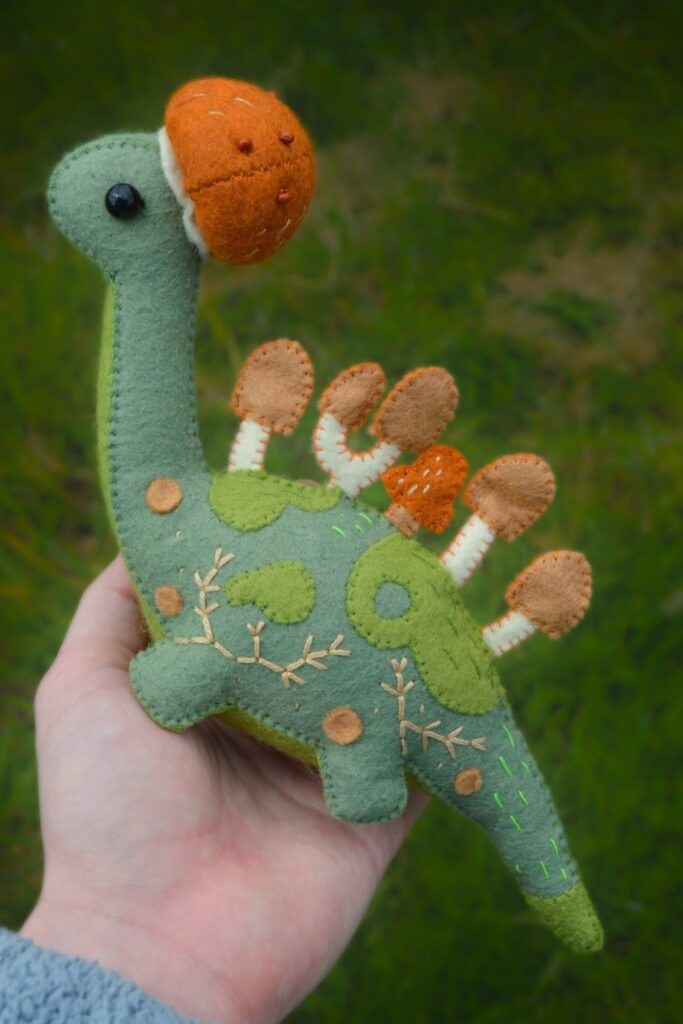
Felt Dinosaur Plush
A felt dinosaur plush is a fun project for beginners. Cut the body and spine shapes from felt fabric. Use a blanket stitch to sew the pieces together, then stuff it lightly.
You can add wonderful details with embroidery. Stitch on vines, spots, and even tiny mushrooms on its back. These small touches give your dinosaur a lot of personality.
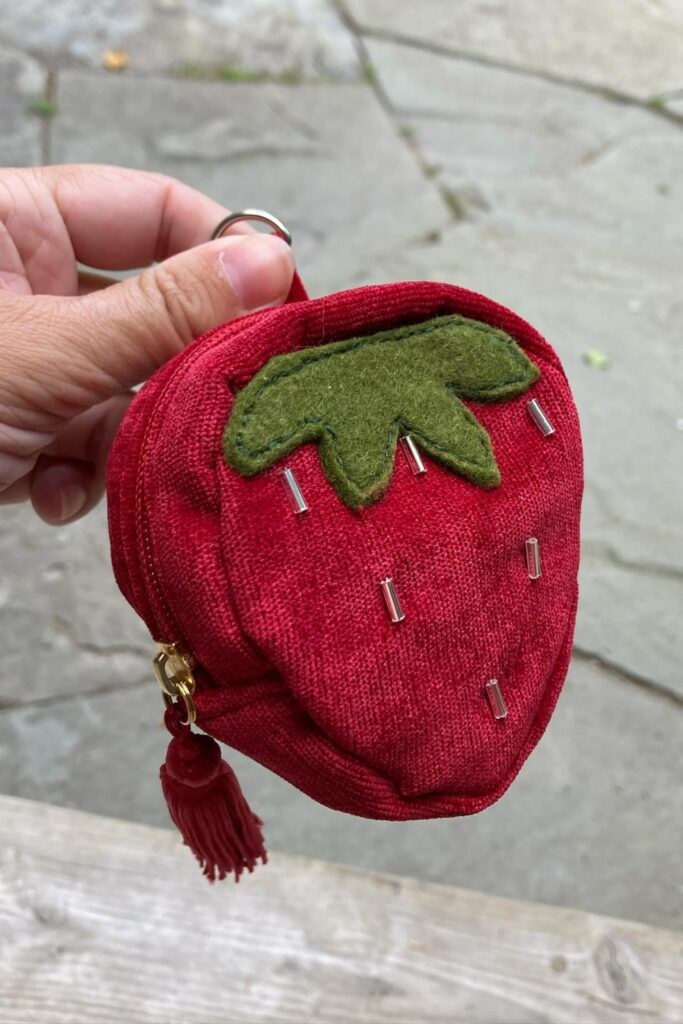
Strawberry Coin Purse
This strawberry coin purse is a cute way to practice small sewing. Cut red fabric into a strawberry shape and sew it into a small pouch. You will need to install a small zipper at the top.
Use green felt to create the leafy top part. You can stitch on small beads or use embroidery to make the seed details. Adding a small tassel or keyring makes it perfect for keys.
Drawstring Portrait Bag
This bag lets you show off your creativity with applique. Start with a plain fabric bag as your base. Then stitch a portrait or character patch onto the front center.
To add more texture, surround the portrait with fabric yo-yo circles. These little circles frame the design beautifully. The drawstring closure at the top keeps your items safe inside.

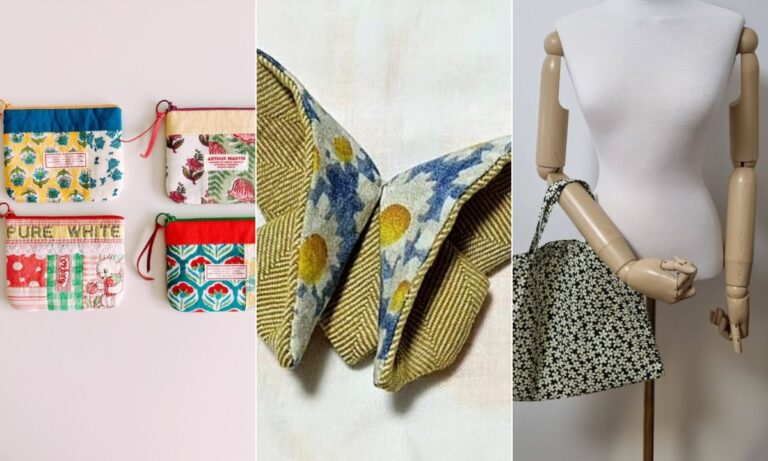
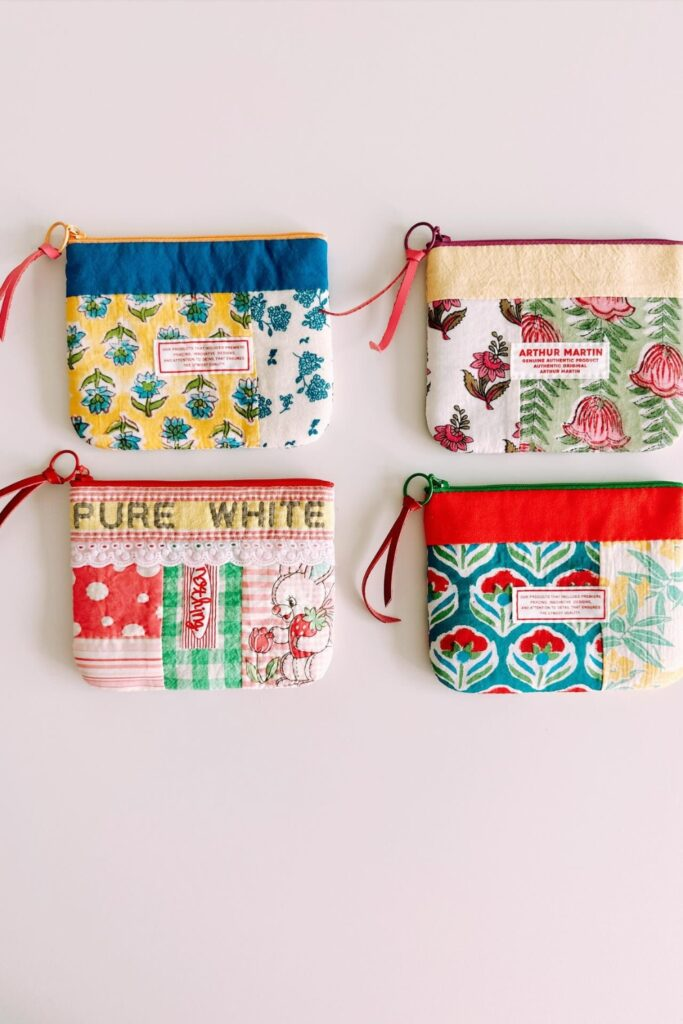
Patchwork Zipper Pouches
These pouches are perfect for using up leftover fabric scraps. Sew small pieces of fabric together to create a patchwork panel. This patchwork piece becomes the outside of your pouch.
Then you attach a zipper between the outer fabric and a lining. This is great practice for installing zippers neatly. You can decorate them with lace, labels, or ribbon pulls.
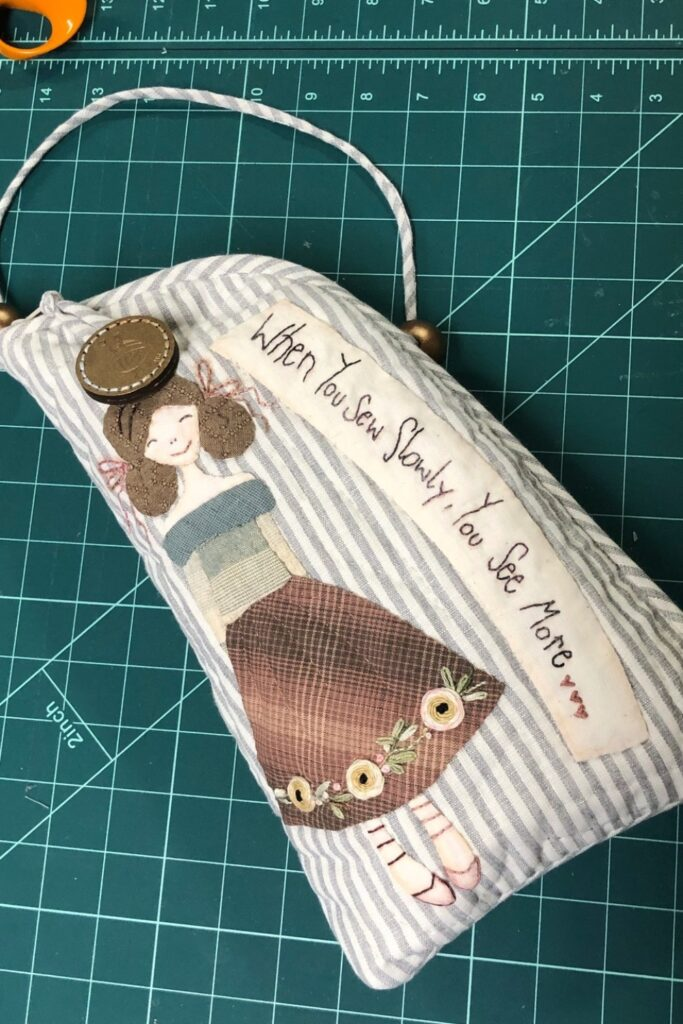
Applique Pouch with Quote
Turn a simple pouch into something personal with applique. Use a striped fabric for the main body of the pouch. Then cut out a character or shape from another fabric and applique it on.
You can add details with embroidery stitches. Stitch a fabric strip with a handwritten or embroidered quote to the front. This makes the pouch special and unique to you.
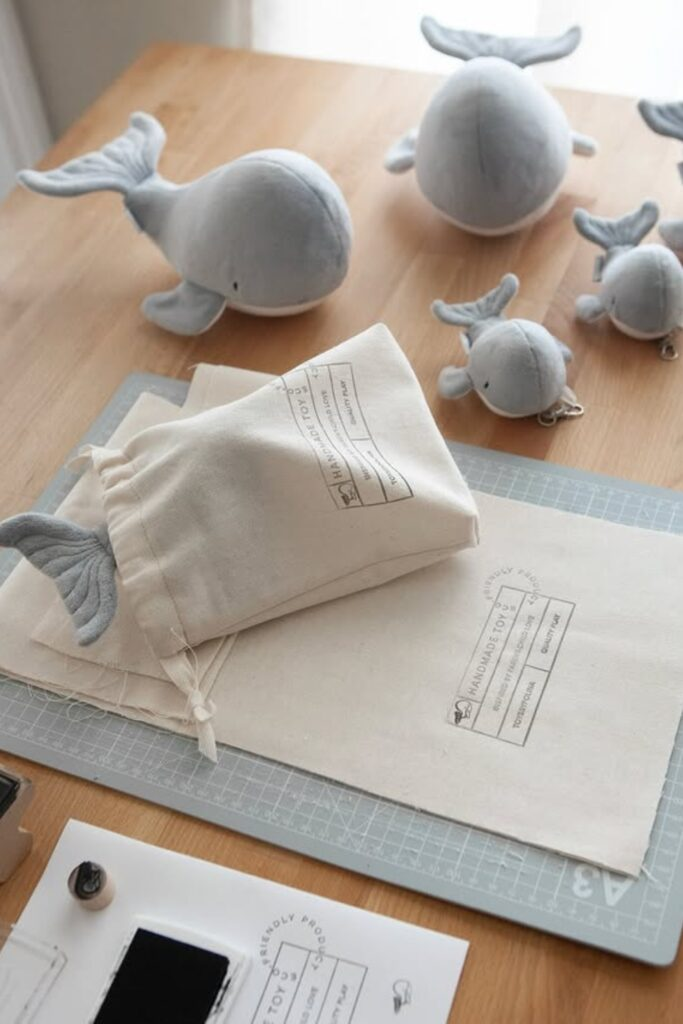
Plush Whale Family
These plush whales are very simple and fun to make. Cut the whale body and tail shapes from soft fleece or felt. Sew them together, leaving a small opening for stuffing.
Stuff them lightly to keep their soft shape. Use embroidery or safety eyes to give them friendly faces. Making a few in different sizes creates a lovely family set.
Fabric Storage Basket
A fabric basket is useful for organizing your sewing supplies. Cut two rectangles, one for the outside and one for the lining. Sew them together along the sides.
To make the flat bottom, you create boxed corners by sewing across the corners. Folding the top edge down shows the lining fabric as a nice color contrast.

Felt Frog Brooch
This small felt frog brooch is full of charm. Cut a frog face and body from green felt. Stitch on large white and black felt circles to make big, cute eyes.
Use pink embroidery thread to stitch on little rosy cheeks. Place the finished frog on a white felt flower and add decorative beads around the edges. Attach a brooch pin to the back.

Baby Overall Dress
This baby overall dress is both cute and practical. Use soft, breathable fabric like double gauze or cotton. The dress has a front pocket that is both charming and useful.
For easy dressing, use snap buttons instead of regular buttons. The adjustable straps make it comfortable for a growing baby. This is a wonderful gift for a little one.

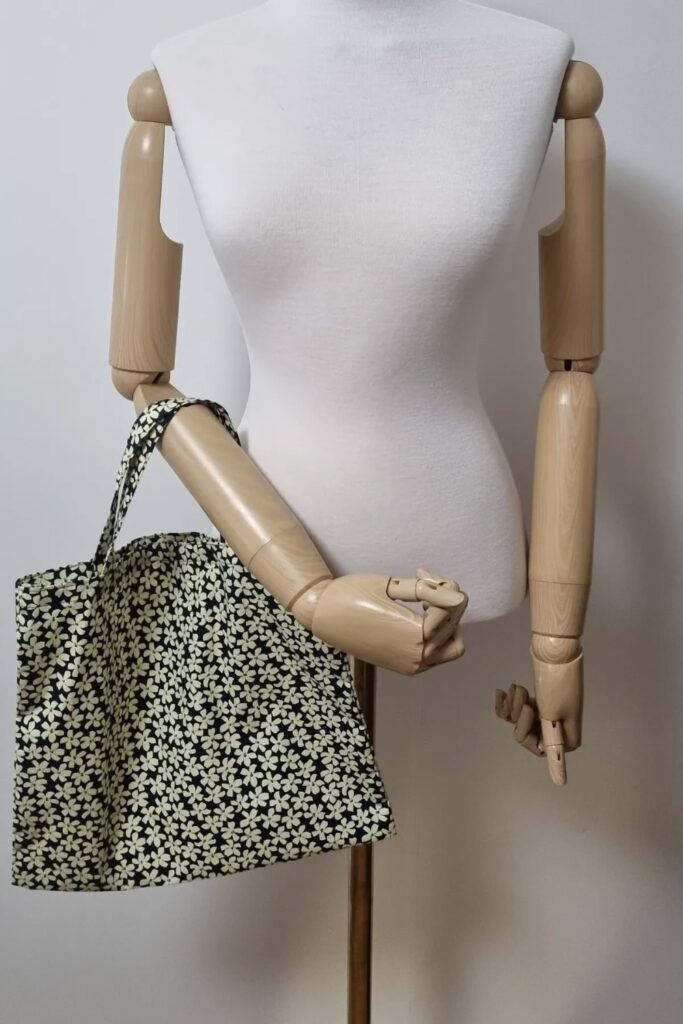
Simple Tote Bag
A tote bag is one of the most useful and easiest sewing projects. Cut two large rectangles from sturdy canvas or cotton. Sew them together along the sides and bottom.
Make long straps from the same fabric and attach them securely. You can leave it unlined for a quick project or add a lining for extra strength and a clean finish.
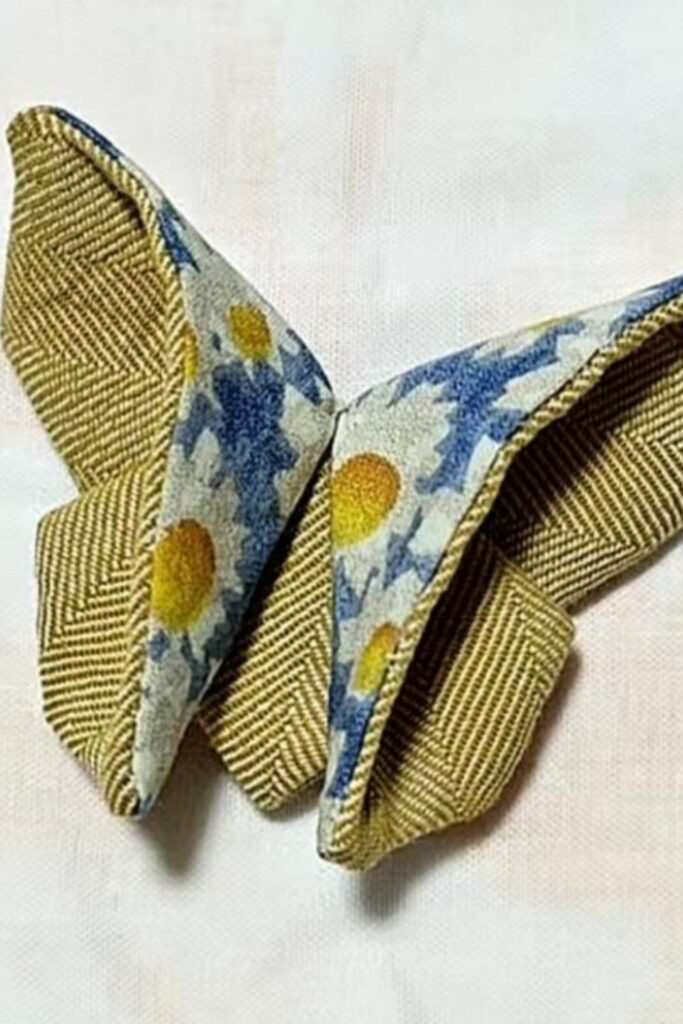
Fabric Butterfly Accent
This fabric butterfly is a quick way to decorate clothes or bags. Cut two butterfly shapes from different contrasting fabrics. Sew them together around the edges.
Then, pinch the center and use a few hand stitches to create the body and hold the wing folds. You can attach it anywhere you want a touch of handmade charm.
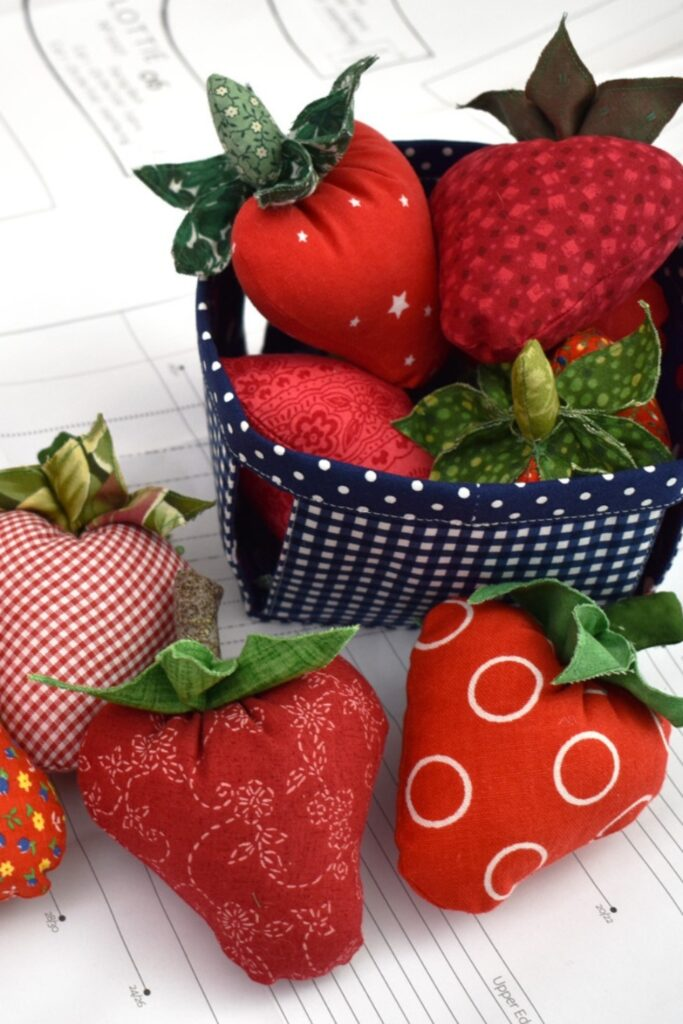
Fabric Strawberry Plushies
These little strawberry plushies are perfect for using fabric scraps. Cut red fabric into heart shapes. Sew two hearts together, leaving the top open, and then stuff them.
Sew the top closed and gather it slightly. Attach green felt leaves to the top to complete the strawberry. They are cute, simple, and great for practicing shapes.
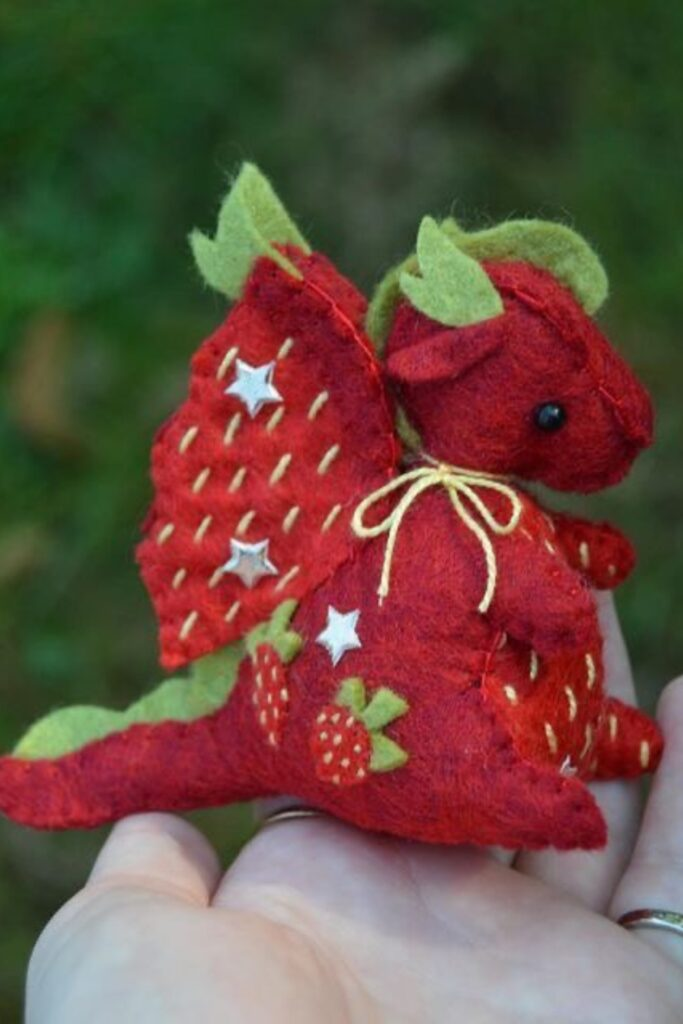
Felt Strawberry Dragon
This strawberry dragon is a magical and fun sewing project. Cut the dragon’s body from red felt to look like a strawberry. Use green felt for the leaves, horns, and wings.
Embroider small seed details on the red body. You can even sew on tiny applique strawberries for extra decoration. It is a unique plush that combines two fun ideas.
FAQs
What fabric should I start sewing with?
The best fabric for beginners is woven cotton, like quilting cotton. This fabric does not stretch and is very easy to handle. It moves smoothly under the sewing machine needle.
You should avoid slippery fabrics like satin or stretchy knits at first. These can be frustrating and difficult to control. Sticking with cotton will help you succeed and make beautiful things.
How do I stop my sewing machine from bunching thread?
Thread bunching is a common problem that is usually easy to fix. First, check that your machine is threaded correctly. Rethread the top thread and also check the bobbin.
Make sure your presser foot is down when you sew. A dull or bent needle can also cause this issue. Try replacing your needle with a new universal needle to see if that helps.