26 Snack Organization Ideas for 2026

How to Organize Snacks?
Start by grouping snacks based on how they are actually used.
Keep grab-and-go snacks separate from lunchbox items and treats.
If you have kids, store their daily snacks together to avoid messes and speed up decisions.
Organizing snacks by purpose prevents chaos and keeps the pantry easier to manage.
It also makes restocking simple and avoids buying duplicates.
A clear system saves time and keeps your kitchen functional.

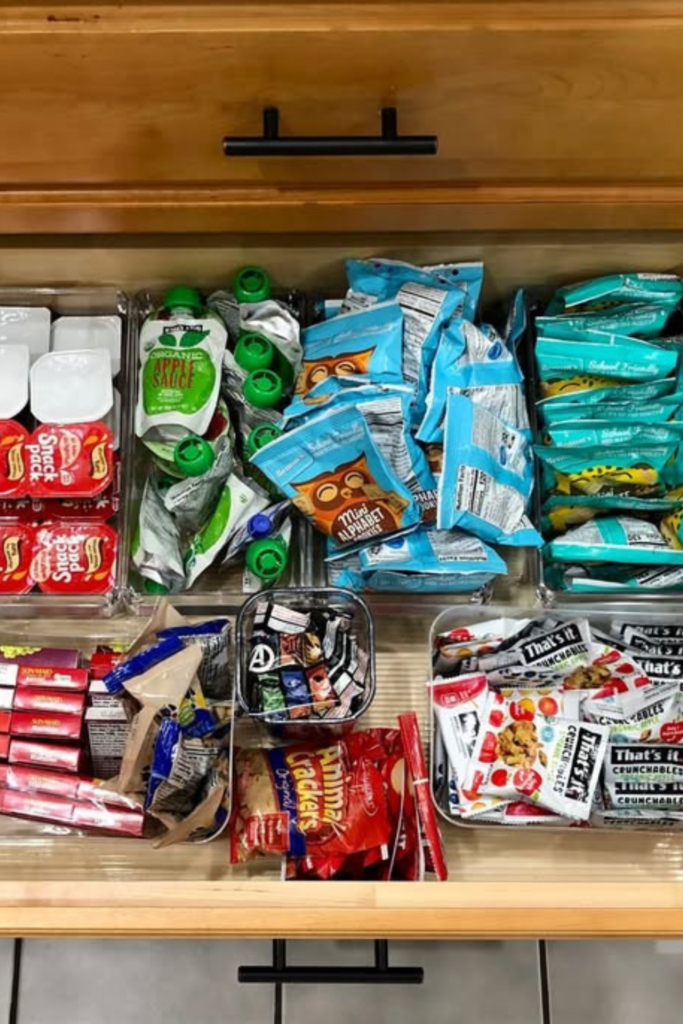
Snack Drawer
Turn a deep kitchen drawer into a grab-and-go snack hub using clear bins.
Flat packets stay visible, pouches stand upright, and small treats stay in place.
Overhead lighting is enough since visibility comes from clear containers, not decorative lights.
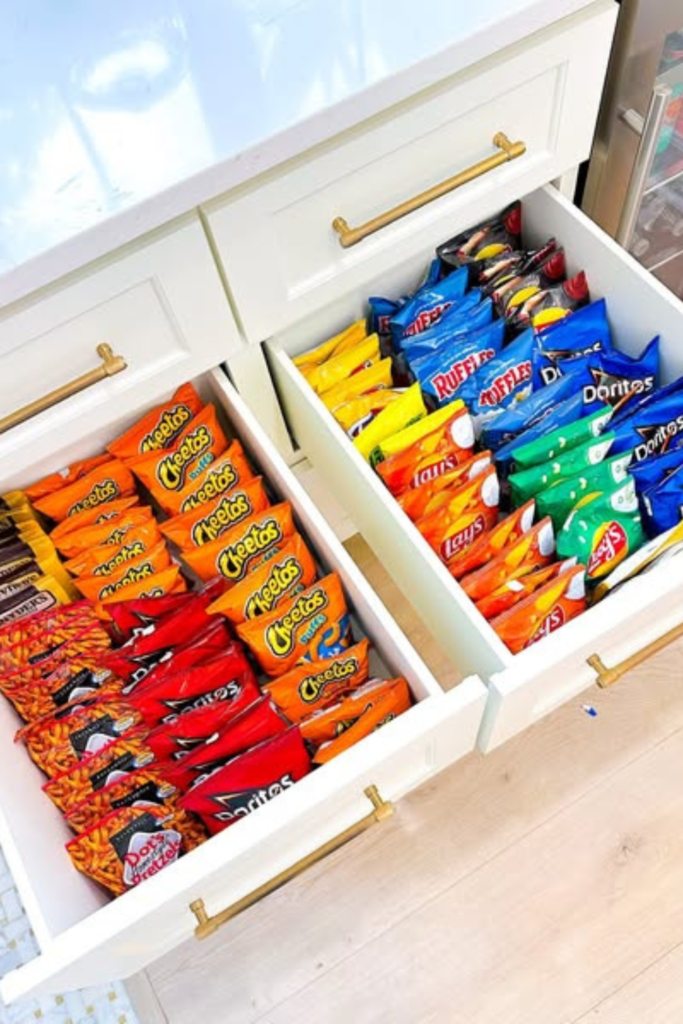
Flavor Rows
Organize chips and snacks by flavor rather than brand to prevent collapsing bags.
Use dividers or box inserts to create vertical lanes.
Bright natural light keeps colors visible, and under-cabinet lights help at night.
Label Swap
Replace bulky packaging with clear zip bags and simple labels.
Portion snacks and stand them upright inside a bin for easy access.
Soft ambient light works well; extra lighting isn’t necessary.
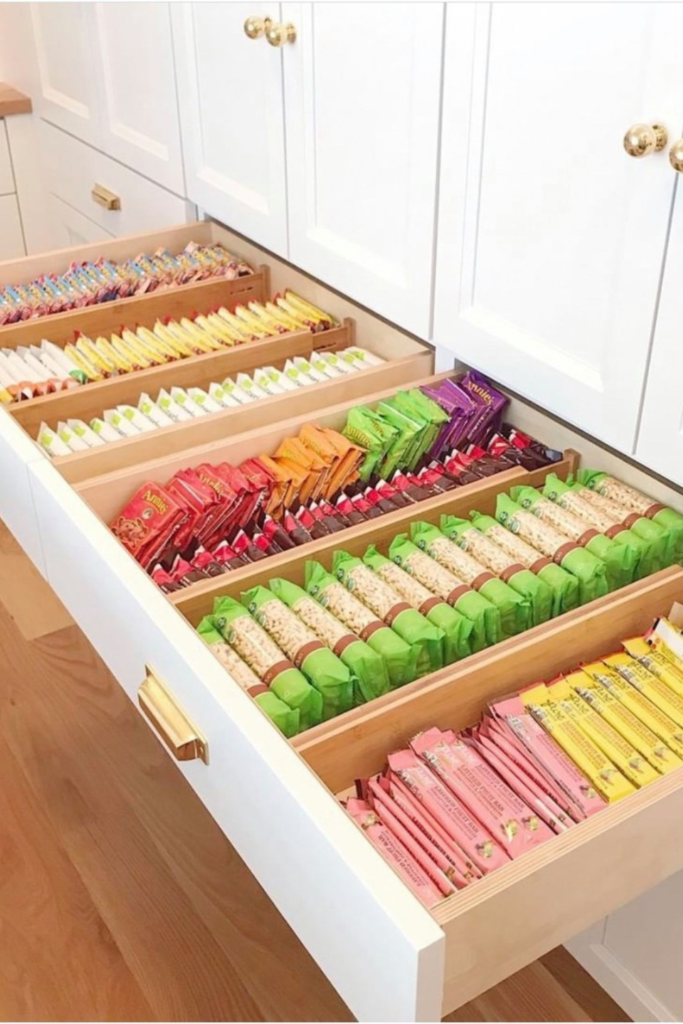
Bar Lines
Organize snack bars by type in wide, deep drawers.
Use wooden dividers to create long sections and keep bars flat.
Natural daylight and soft overhead lighting make labels easy to read.
Drawer Zoning
Separate snack types by drawer level to avoid overlapping.
Use upper drawers for bars and pouches, lower drawers for bulkier items.
Warm under-cabinet lighting helps scan each zone even at night.
Clear Grid
Airtight square containers prevent loose snacks from turning into crumbs.
Keep similar textures together for easier refilling.
Soft overhead lighting paired with natural daylight keeps everything visible.

Daily Portions
Pre-pack snacks into individual portions for quick grab-and-go access.
Use slim, clear bins to separate bars, crackers, fruit cups, and pouches.
Refill only during grocery restocks to maintain order.
Snack Organization Shelf
Use uniform containers to keep shelves consistent.
Pull-out trays handle packets, and clear jars keep items visible.
Soft cabinet lighting and natural light make scanning the shelf easy.
Counter Canisters
Frequently used snacks deserve counter space.
Use tall, matching glass canisters for quick access.
Natural light and soft ambient evening light keep the surface calm and tidy.
Snack Cart
Use a rolling cart when cabinets are full.
Assign each tier a purpose and keep heavier items at the bottom for stability.
Overhead lighting is sufficient as open sides let light reach all levels.
Snack Rows
Organize by color or type in shallow drawers for fast restocking.
Use dividers to prevent rows from collapsing.
Bright overhead light keeps labels readable.
Snack Pantry Zones
Assign one shelf solely for snacks and split it into clear zones.
Use baskets and bins for ready-to-eat and baking snacks.
Bright pantry lighting ensures zones are easy to spot and maintain.
Snack Shelf Stacking
Use vertical space to lift smaller snack boxes and cans.
Risers and trays keep items contained.
Balanced lighting makes every shelf visible and organized.
Snack Organization Cubes
Small compartments stop snack bars from sliding into messy piles.
Use wooden dividers to give each snack its own square.
Soft overhead lighting ensures every item is easy to spot.
Snack Packet Lines
Use long, narrow bins to keep flat snacks upright.
Refill from the back to rotate older snacks forward.
Bright lighting ensures labels are easy to read.
Snack Display
Open shelving works best when snacks are meant to be seen and grabbed.
Use clear jars for loose items and labeled baskets for packaged snacks.
Overhead and ambient lighting keeps the display clean and bright.
Snack Drawer Lanes
Create straight lanes in medium to deep drawers to prevent sliding snacks.
Use long acrylic or wooden dividers to form fixed channels.
Bright drawer lighting combined with overhead light makes scanning easy.
Snack Sorting Pods
Use divided containers to sort small snacks by type.
Keep similar sizes together to avoid bending wrappers.
Soft ambient lighting keeps everything visible.
Labeled Snack Bins
Clear bins with front-facing labels simplify organization, even for kids.
Sort by snack type for flexibility.
Bright shelf lighting makes labels easy to read and maintain.
Snack Category Shelves
Assign a dedicated shelf for snacks and split by purpose: kids, treats, quick bites.
Use clear bins for separation and stability.
Bright lighting keeps everything visible and easy to maintain.
Snack Container Grid
Matching square containers create order automatically.
Rows stay tight and nothing shifts when opening the drawer.
Fill only daily-use levels to avoid overstocking.
Snack Jar Lineup
Uniform jars turn loose snacks into easy-to-manage storage.
Use toggle-style handwritten labels for clarity.
Even overhead lighting keeps every jar visible.
Snack Cabinet System
Use clear containers for tall cabinets to separate snack types.
Keep daily snacks at eye level and backup items below.
Cabinet lighting makes labels readable and restocking easier.
Snack Basket Zones
Wire baskets create structure when pantry shelves are overwhelming.
Assign one basket per snack type.
Overhead pantry lighting ensures everything is visible.
Snack Pouch Stand
Use tiered bamboo or acrylic stands to keep soft pouches upright.
Heavier pouches go on the bottom row for stability.
Lighting helps identify low-stock items quickly.
Snack Drawer Blocks
Use clear rectangular bins to form solid sections in drawers.
Each snack type holds its shape even when half-full.
Lighting ensures every block is visible and easy to refill.
FAQs
How do you keep snacks organized long-term?
Snacks stay organized when the system matches how they are used.
Keep categories simple, limit snacks per bin, and reset during grocery restocks.
Clear spaces and natural stopping points prevent the mess from returning.
What’s the best way to organize snacks in a small kitchen?
Use vertical storage, deep drawers, stackable bins, or rolling carts.
Keep all snacks in one defined zone instead of spreading across cabinets.
This prevents competition with cookware and makes the area functional.